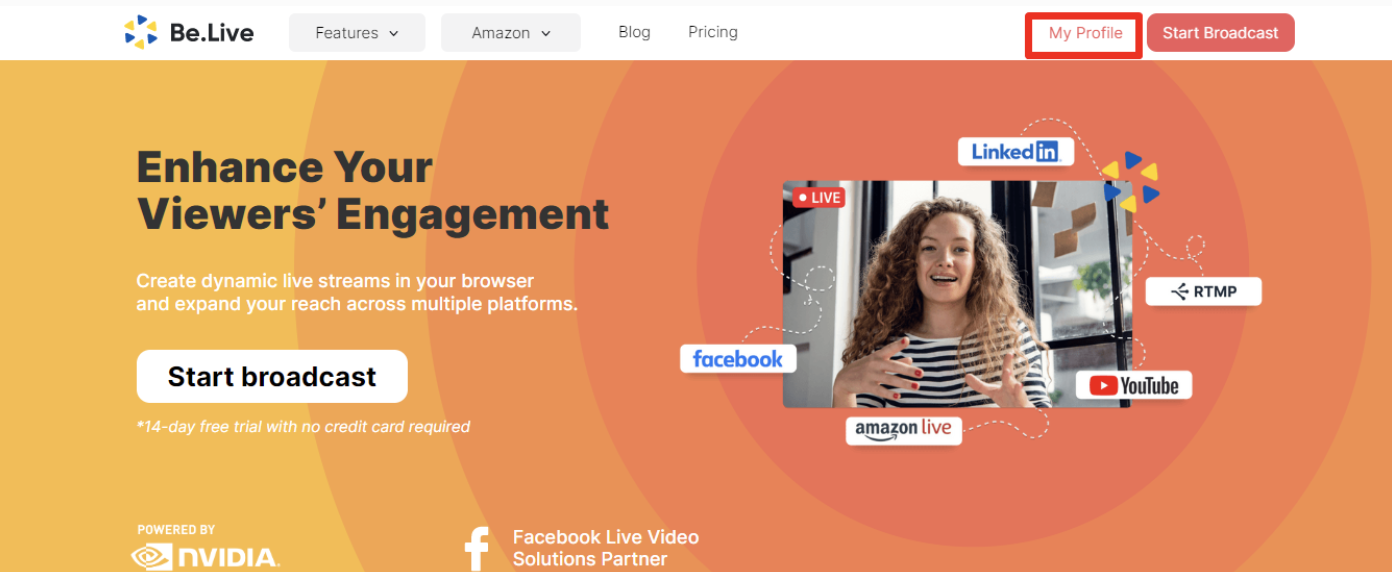
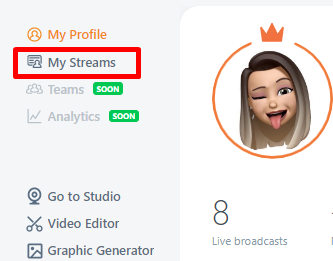
From the Be.Live homepage, click My Profile > My Streams:


Alternatively, you can do that directly from the Studio. Click your profile photo > My Streams

Locate the broadcast you wish to remove, and click on the Bin icon to delete it:
Deleting your scheduled broadcast on Facebook
You can delete your scheduled Facebook broadcasts through the website or on your Facebook mobile app. To do so, you need to locate your event first. You can do that through the Events section.
Web view:

Once you open the Events section, you will see the Upcoming events listed.
Open the Event you wish to delete -> Click on the three dots icon -> And choose Cancel event

When you cancel your event, Facebook suggests two options to choose from.

- The Cancel event option notifies your event guests and leaves the event visible to everyone. Choosing this option also allows you to add a post to this event explaining what happened. It is an optional field and you can skip it if you wish.
- If you choose to Delete event, it will be erased completely without any way to check it again. As the event will be removed, there is no option to do a post in it as well.
Choose one and press Confirm to continue. This action can't be reversed!
Mobile view:

That's how the list of your events looks like in the Facebook app.
Open the Event you wish to delete -> Tap the blue Manage button -> Choose Edit

At the bottom of your screen, you will find the Bin icon. Tap on it.

Just like on the website, first, you need to choose if you wish to Cancel your event or Delete it.

- The Cancel and keep event details option notifies your event guests and leaves the event visible to everyone. Choosing this option also allows you to add a post to this event explaining what happened. It is an optional field and you can skip it if you wish.
- If you choose to Cancel and delete event details, it will be erased completely without any way to check it again. As the event will be removed, there is no option to do a post in it as well.
Choose one and confirm the action by pressing the blue Cancel event button. This action can't be reversed!
That's it! Your scheduled event was either cancelled or completely removed from Facebook.
Other things to know about Facebook events:
- If you have several Facebook destinations scheduled, you need to repeat these steps for every other destination as well.
- The cancelled event can still be deleted if you change your mind. But you are not able to "un-cancel" it.
Deleting your scheduled broadcast on YouTube
You can delete your upcoming YouTube broadcasts using the website or the YouTube app on your mobile device. Follow these steps to proceed.
YouTube webpage
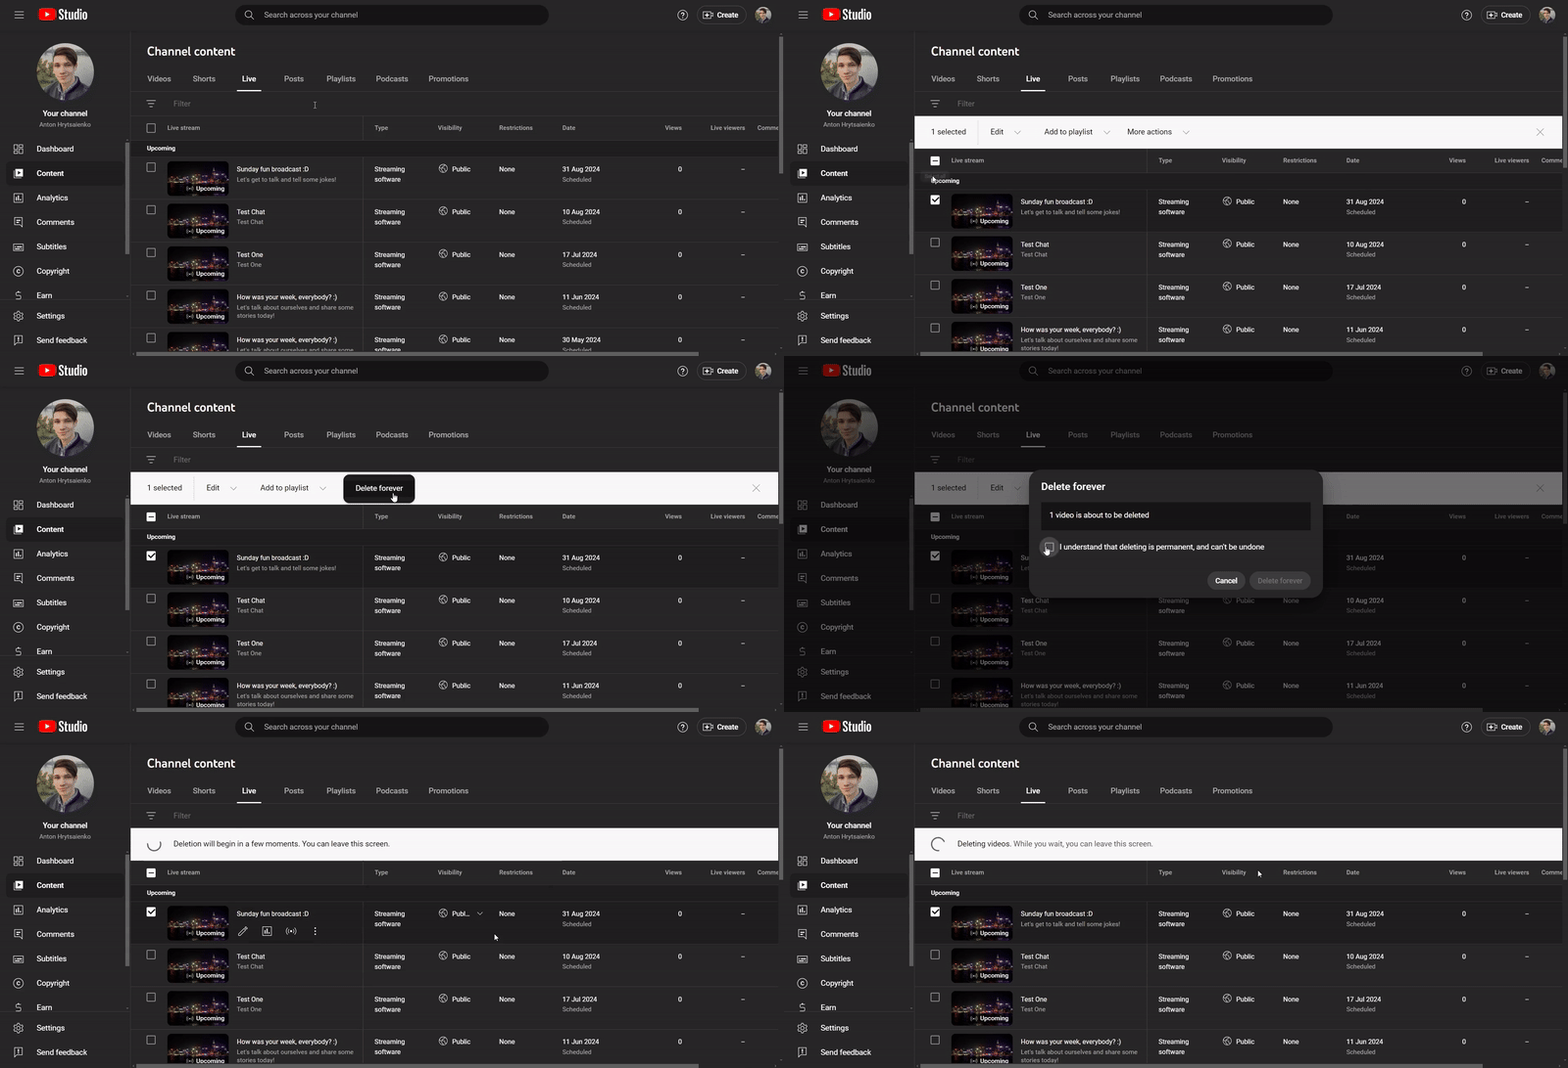
1. Go to the YouTube website and press Your videos from the menu on the left

2. Broadcast you streamed with Be.Live will be under the Live category.

3. You can find scheduled broadcasts in the Upcoming section. Tick the checkbox for the broadcast you wish to delete.
4. From the options above the videos choose More actions -> Delete forever.
5. Confirm the action by checking the check box in the pop-up and pressing Delete forever again. This action can't be reversed!

Once done, the removal process will start. You can leave the page before the confirmation, the video will be removed automatically.
YouTube mobile app
1. Open your YouTube app and go to the You section at the bottom right corner.

2. At the top of your screen tap on your channel picture or name to open it.

3. To find your scheduled broadcasts choose Live at the top.

4. Locate the upcoming broadcast you need to remove and tap on the three dots next to it.

5. Tap Delete to remove it.

6. Confirm the action by pressing Delete in the pop-up. This action can't be reversed!

That's it, your scheduled broadcast was removed from your channel!
Related article:
Navigating Your Be.Live Profile and Broadcasts Page