Virtual backgrounds have become a common feature in live streaming, adding a hint of style and professionalism to video broadcasts. In this guide, we'll explore four popular apps—OBS, Chromacam, Manycam, and XSplit—and how you can seamlessly integrate them into your Be.Live sessions.
General Setup:
Before diving into specific applications, let's cover the general setup process. Here is how you can set up a 3rd party application as a virtual camera in our Be.Live Studio:
- First, download and install the third-party application of your choice.
- Next, within the application, set up a virtual camera and configure your desired virtual background.
- Once that's done, open Be.Live Studio, navigate to the camera settings and select the virtual camera you've just created.

With these simple steps, you'll be ready to impress your audience with dynamic backgrounds during your live streams.
Application Overview:
1. OBS - Open Broadcaster Software (Windows & MacOS)
OBS is a versatile and free software favored by many streamers for its robust features. To use a virtual background in OBS, you’ll need a green screen, as this application doesn’t offer background removal functionality. Here you can learn how to set up a virtual background with a green screen on OBS.
After the background is set up, you’ll need to configure OBS as your virtual camera within Be.Live Studio. Here you can find out how to start a virtual OBS camera: Virtual Camera OBS Guide. Once done, simply select OBS camera in the camera settings in the Studio and you’ll see a camera source with your virtual background setup.
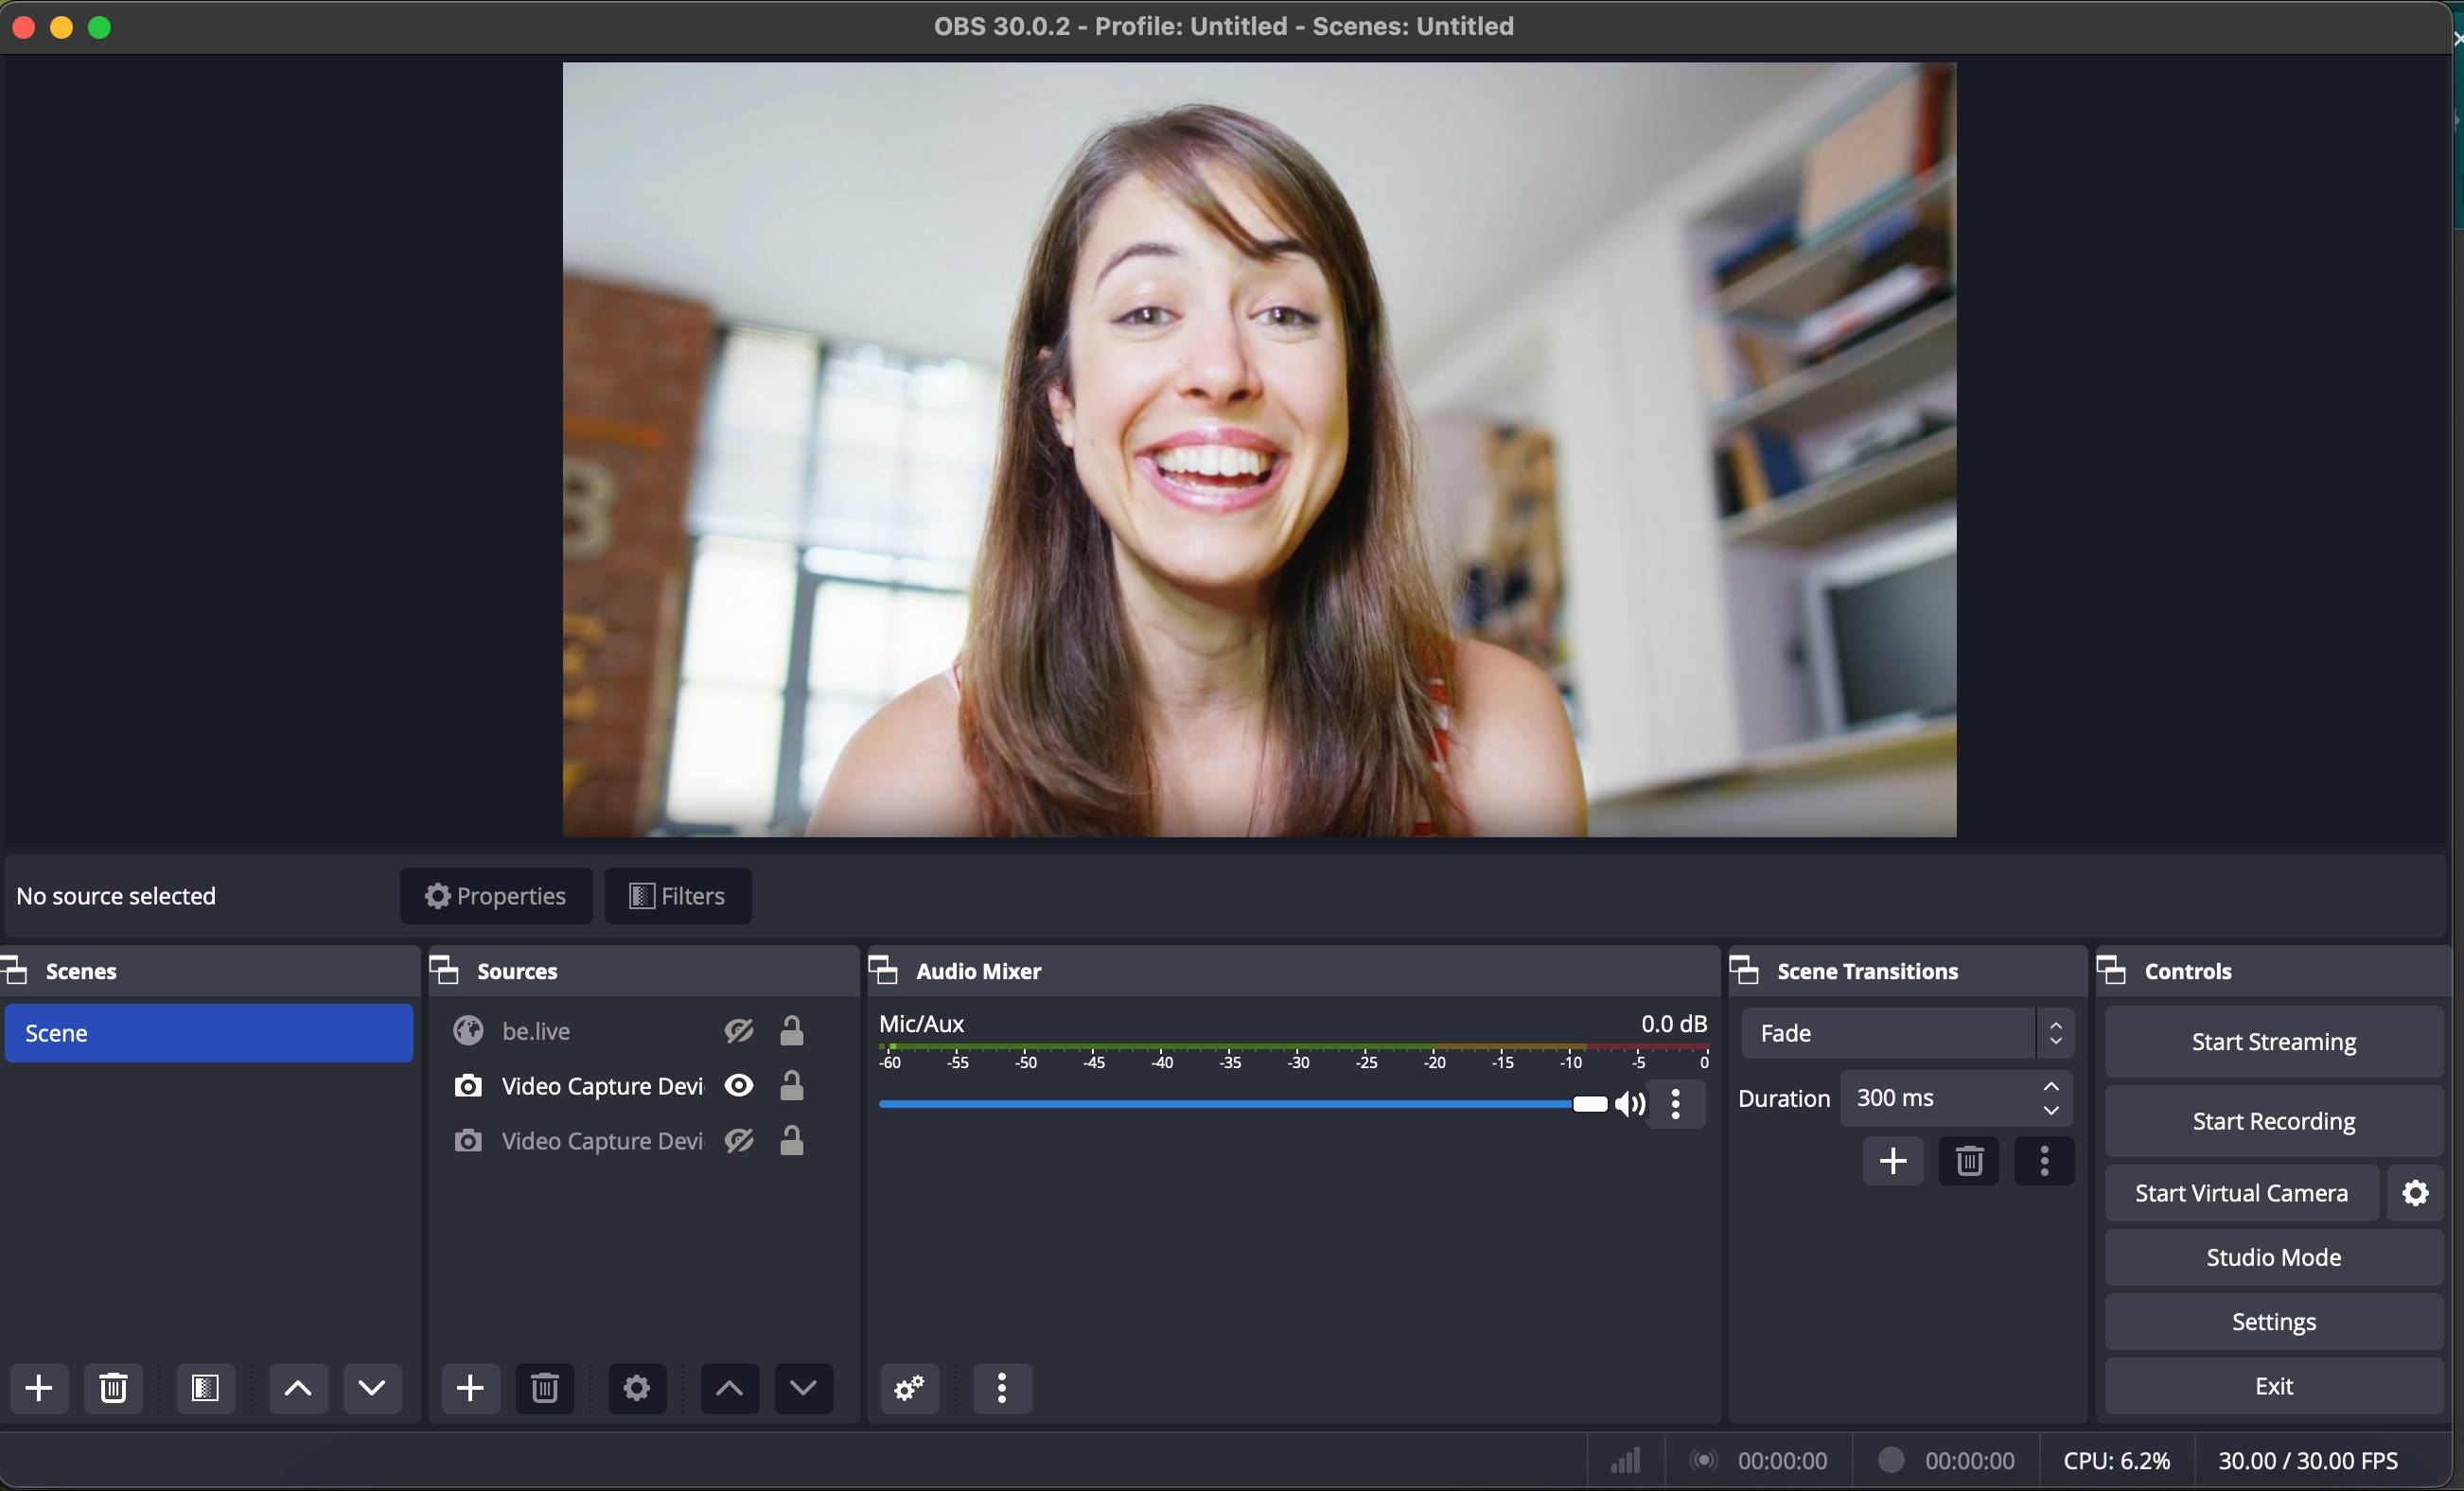
OBS offers many customization options, making it ideal for users who want full control over their virtual backgrounds.
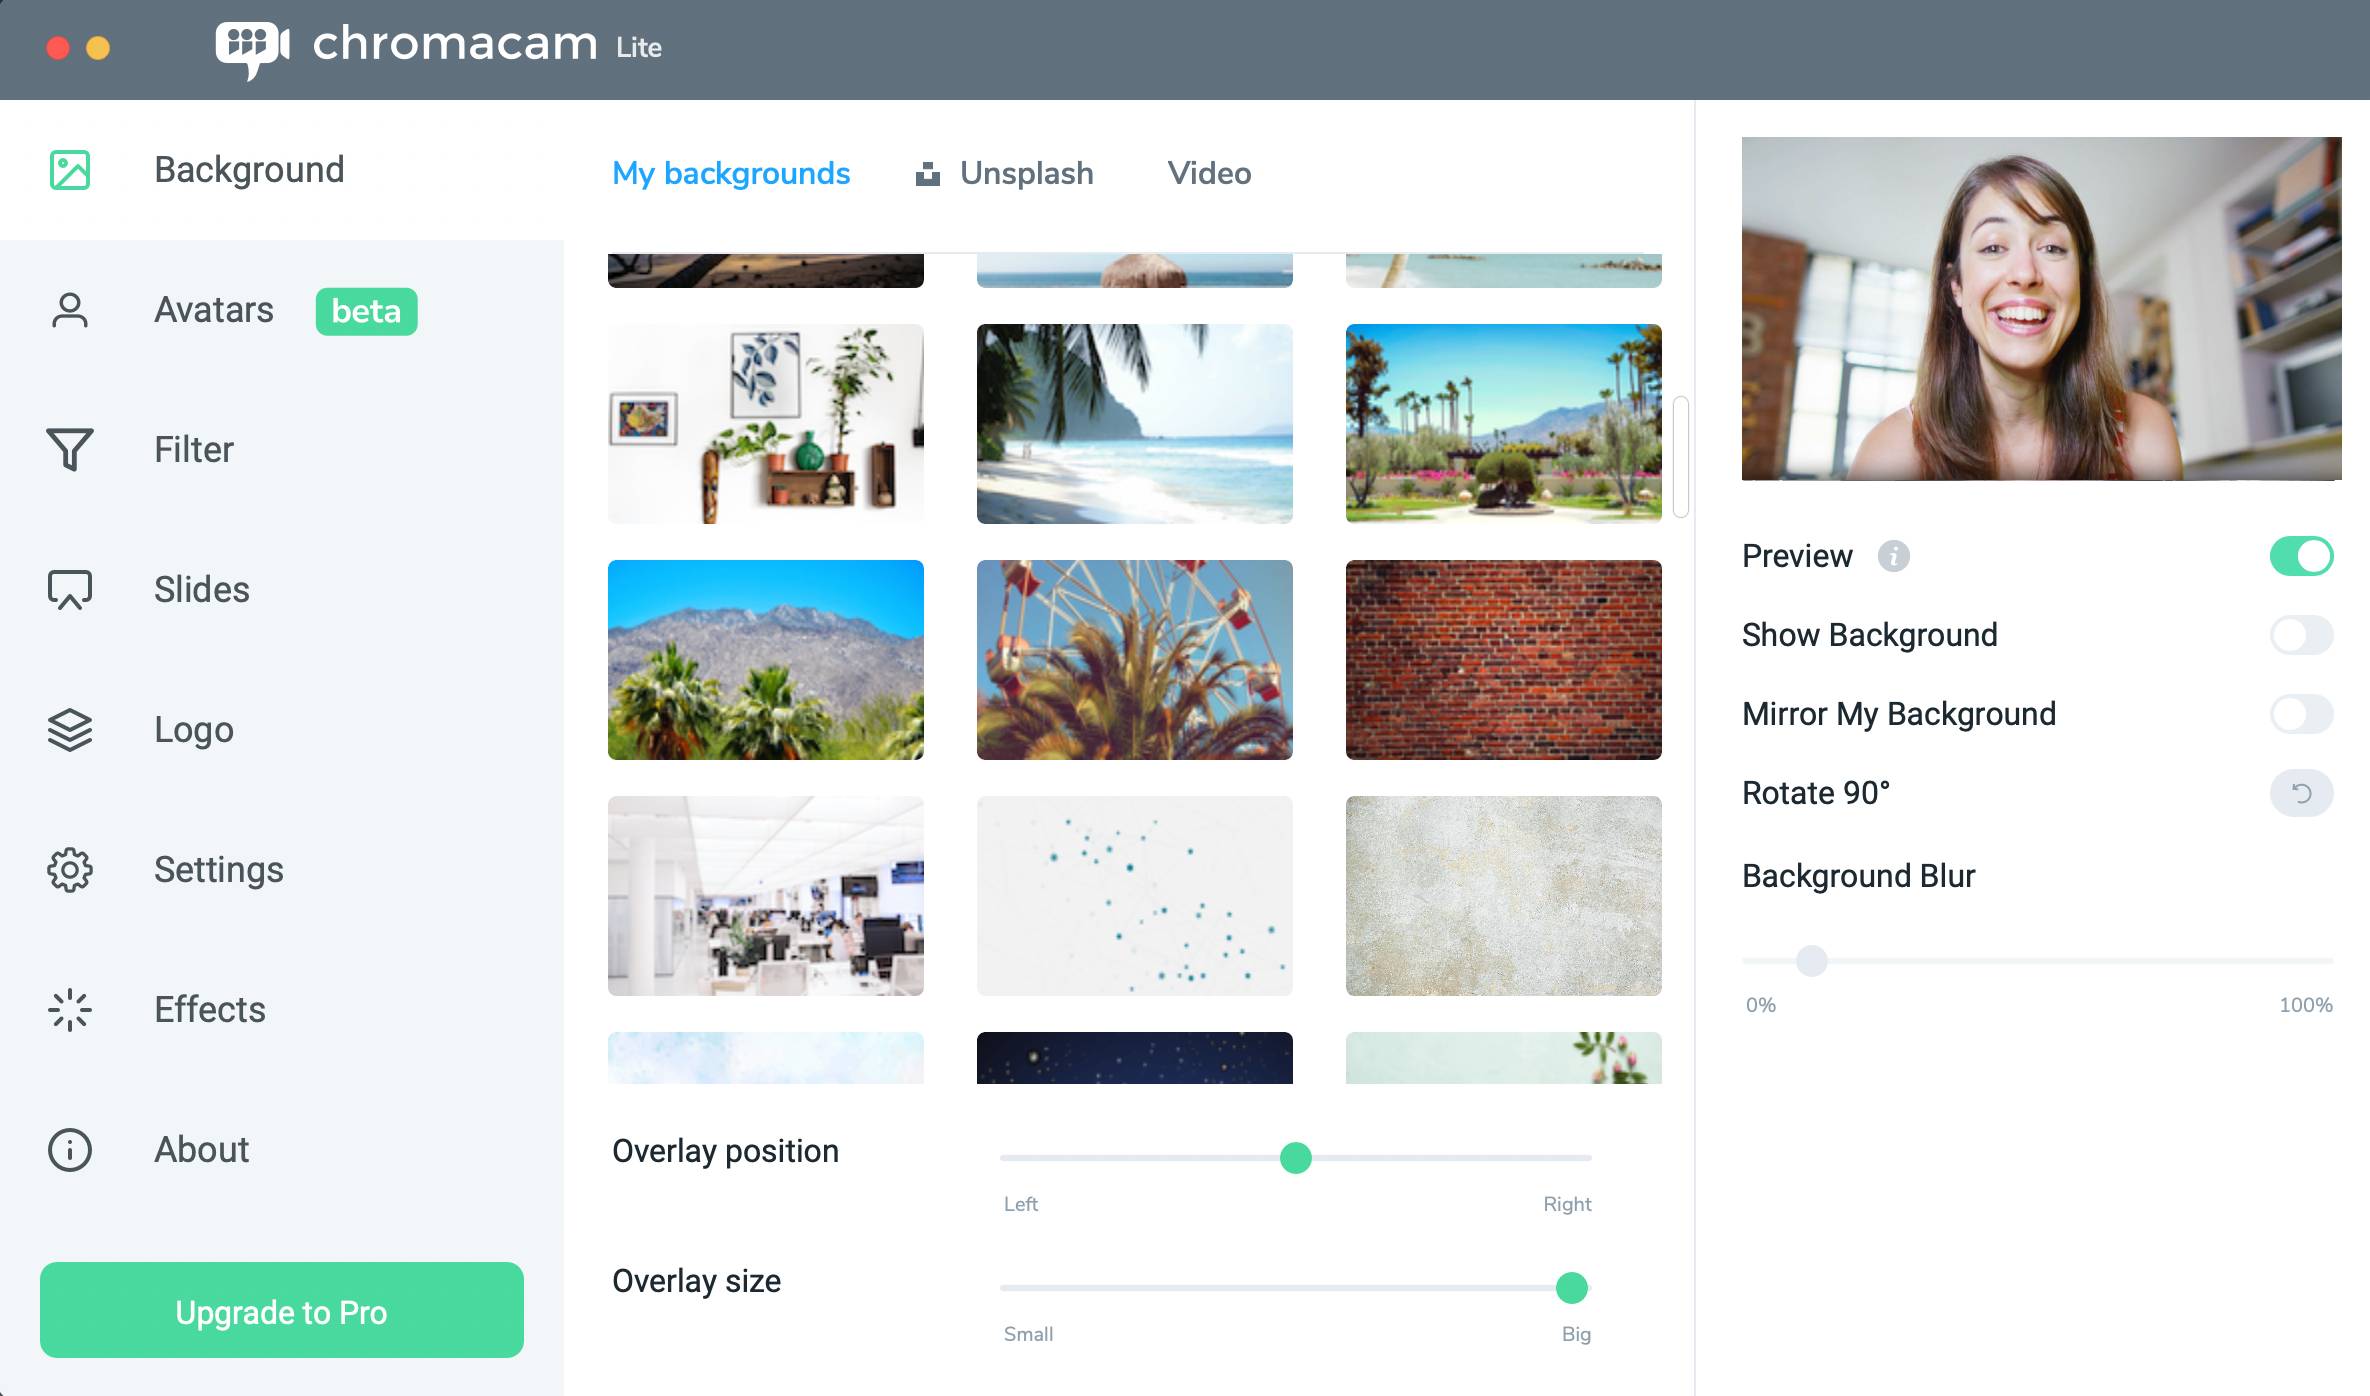
3. ChromaCam (Windows & MacOS)
Chromacam specializes in providing high-quality virtual backgrounds with minimal setup required. You can add custom pictures, images from Unsplash, videos from your device or YouTube as virtual backgrounds. Additionally, you can use different effects and even set up avatars.
The Chromacam free plan includes a virtual green screen, limited background blur, a limit on frames per second, and a ChromaCam watermark. You can also try out avatars and video backgrounds. With a paid plan, you can get access to all of their features, including custom backgrounds and logos, streamer effects, and full background blur.
Using Chromacam with Be.Live Studio is as simple as selecting it as your virtual camera source. After you set up ChromaCam, the app will ask you for all the necessary permissions to set up a virtual camera. All you need to do, is to select the background in the app, then go to the Studio and select ChromaCam virtual camera in the camera settings. That’s it!
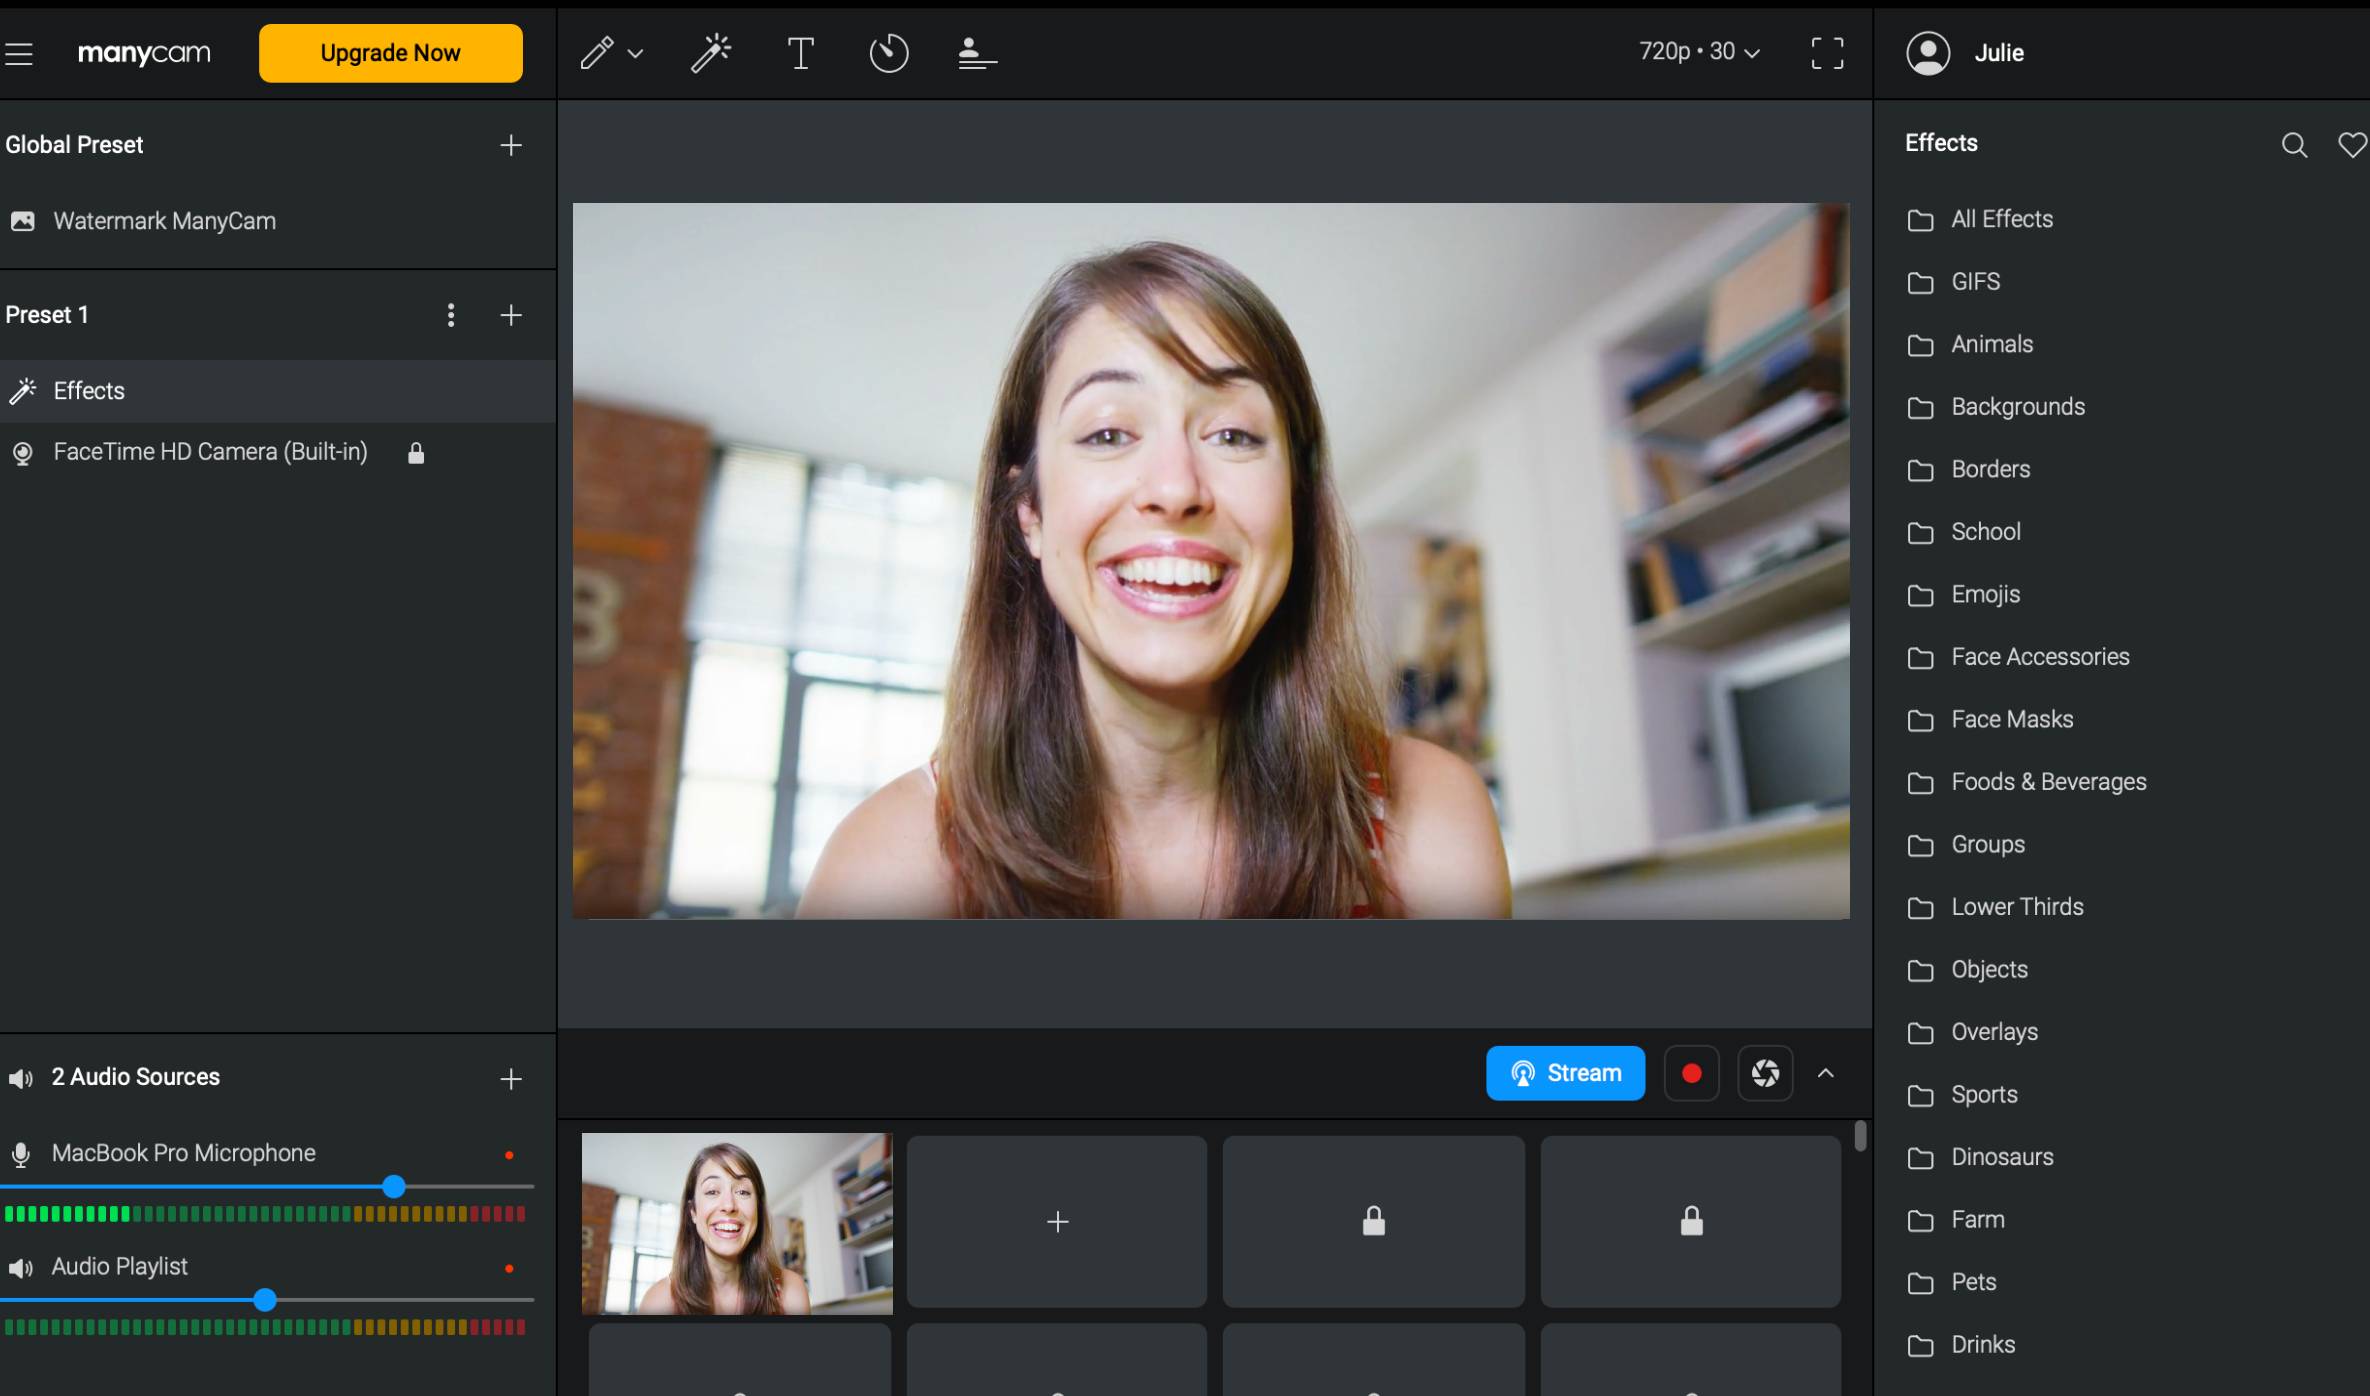
4. ManyCam (Windows & MacOS)
Manycam is another tool that allows for the integration of virtual backgrounds into your Be.Live broadcasts. With ManyCam, you can select such backgrounds as transparent backgrounds, Blur, an image or a video file from the ManyCam collection, or any custom image or video of your choice. The app also provides a large library of effects, overlays, and graphics to add personality to your broadcast. However, the virtual background feature is only available for Studio ($79/year) and Premium ($99/year) subscriptions.
You can learn more here about setting up the virtual background with ManyCam.
5. XSplit (Windows & MacOS)
XSplit offers advanced features for users seeking professional-grade virtual backgrounds. With XSplit, you can easily add and customize virtual backgrounds to suit your branding or theme. The app supports such backgrounds as images, videos, HTML files, YT videos, webpages and easy access to backgrounds from Unsplash.
Simply install the application, grant access to your camera and microphone, and choose the background that fits your style. Afterward, you’ll be able to select XSplit VCam in the Studio camera settings.
Please note that the free version comes with an XSplit watermark. To remove tit, you’ll need to get a subscription to the Premium plan.
Also, XSplit currently is BETA testing VCam.ai. During the BETA period, you can get access to all the features for free. You can download VCam.ai here (currently available only for MacOS).

Adding virtual backgrounds to your Be.Live streams can really jazz up the look and feel of your broadcasts, making them more engaging and visually appealing. With tools like OBS, Krisp, Manycam, Chromacam, and XSplit, you've got tons of options to play around with, from fancy features to personalized touches. So, why not give them a try and see which one clicks with you?
Related article:
How to Check Camera and Microphone Settings Inside the Production Studio
If you need any assistance, our support team is just a message away!