Experiencing problems with your camera or microphone? Getting a black/white screen instead of your camera image? We've prepared a list of basic troubleshooting tips for you to get the issue fixed!
Close other software or programs that may be using your webcam
If you're getting a black/white screen, it's possible that another software in the background is using your camera, therefore blocking Be.Live's access. Additionally, please note that certain antivirus software and firewalls may block the ability to connect your camera.
Make sure you have the latest version of Chrome or Safari
Updating is definitely important: new updates fix bugs and glitches that slow down your computer.
Refresh the page
If your screen is stuck or frozen, refreshing the page will fix the problem. Don't worry - refreshing will not stop your broadcast.
Grant permissions for Be.Live to access your camera, mic and speakers
First, close the camera window in the studio by clicking the X icon in the top right corner. Afterwards, click on the tune icon beside the address bar in the top left corner of the page.
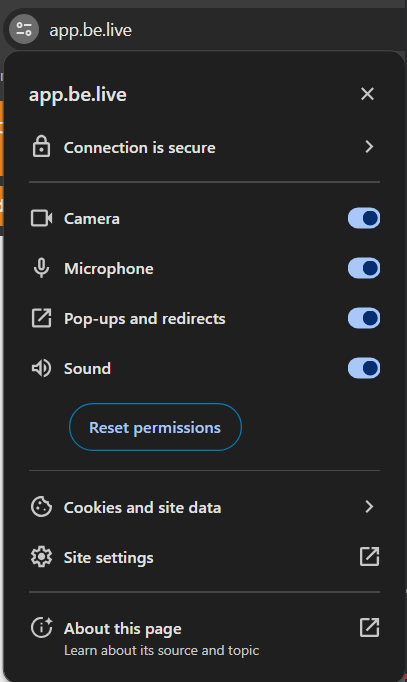
2. Switch on the Camera and Microphone toggles in the pop-up window
3. Refresh the page with the studio
4. Connect your camera
Clear cache and reboot your computer
This simple step can help fix freezing, lags, delays, black screen, etc.
Temporary files like internet history, cookies, and cache take up a ton of space on your hard disc. Deleting them frees up valuable space and speeds up your computer. Learn how to clear your cache on Chrome here. For Safari, click here.
Restarting the computer refreshes the memory and prompts essential tools to run maintenance on it. When you leave your computer on, background programs and apps hog its memory, so rebooting will surely speed up your computer/laptop.
Run the Webcam test
If you see a message marked with red like down below, there is an issue with Chrome's access to your camera/mic. Please allow access to your camera and run the test again.

Check computer settings to make sure Chrome has access to your camera/mic
For Mac: System Preferences -> Security & Privacy > Camera / Microphone sections.
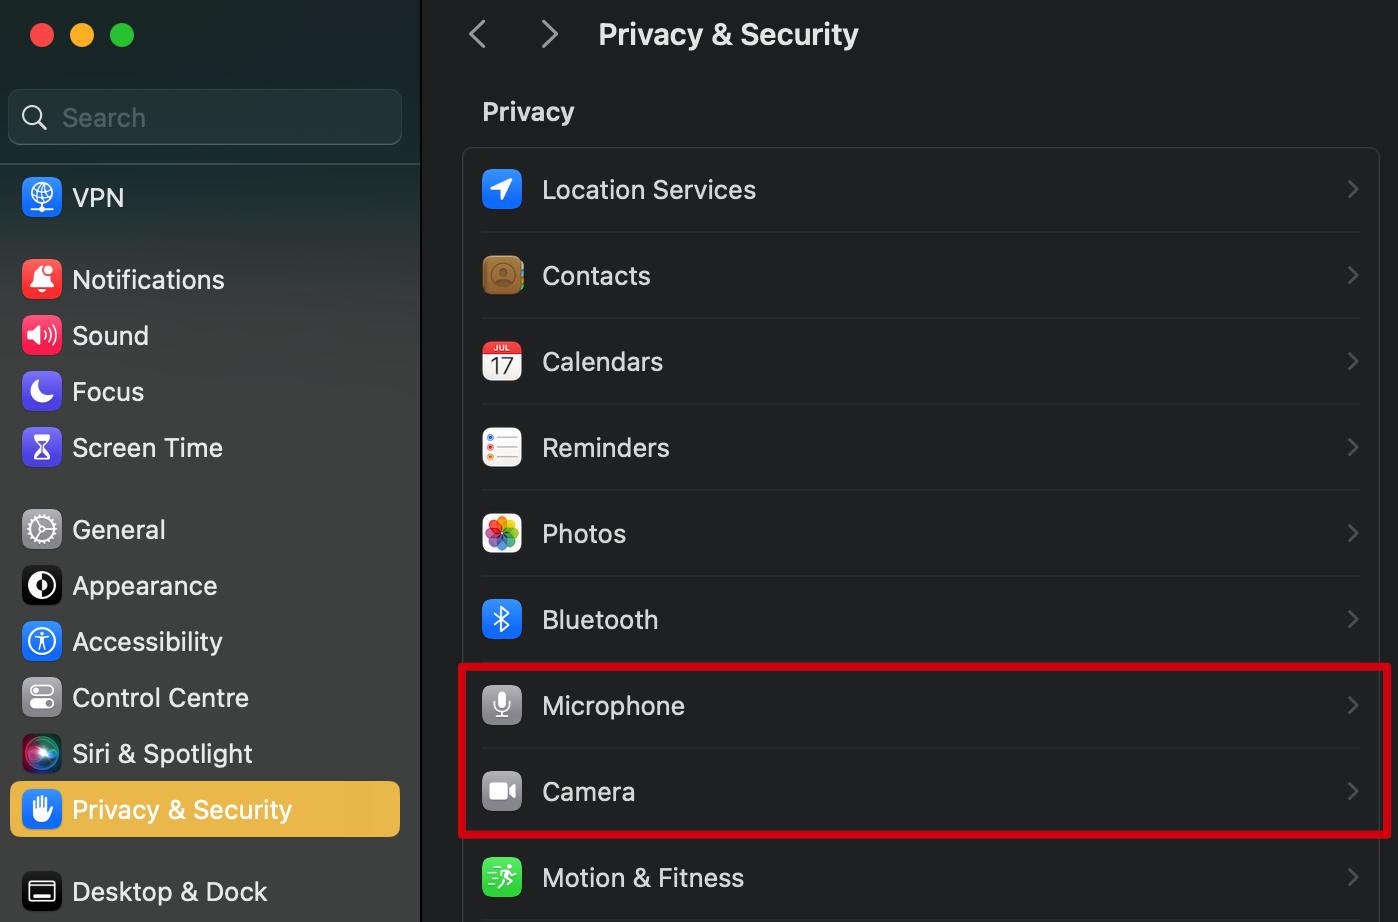
Make sure the toggle is enabled for Chrome in both the camera and mic sections.
If you're using an external camera/mic, try re-plugging it in.
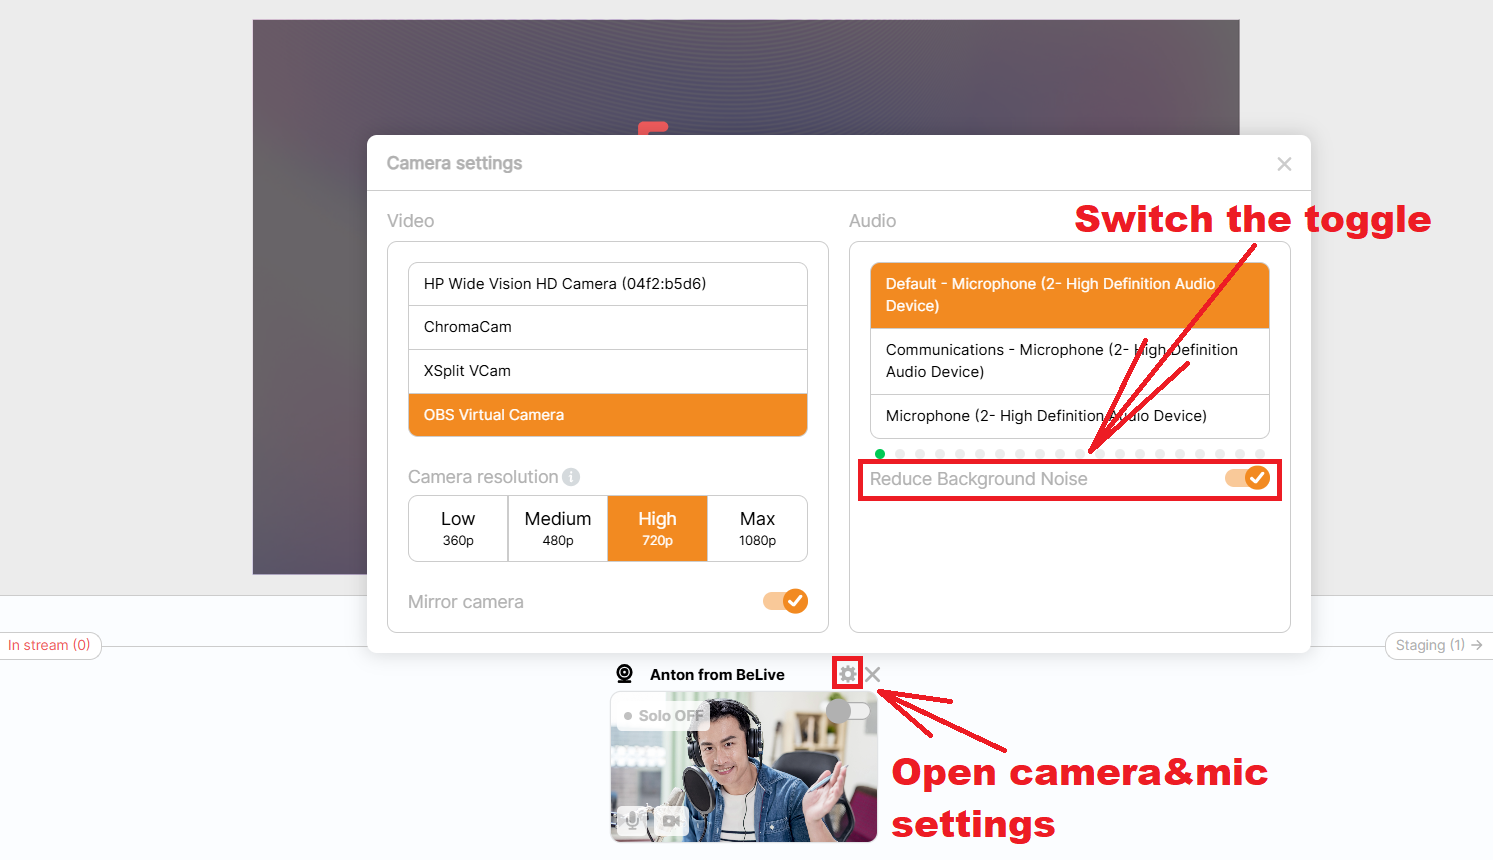
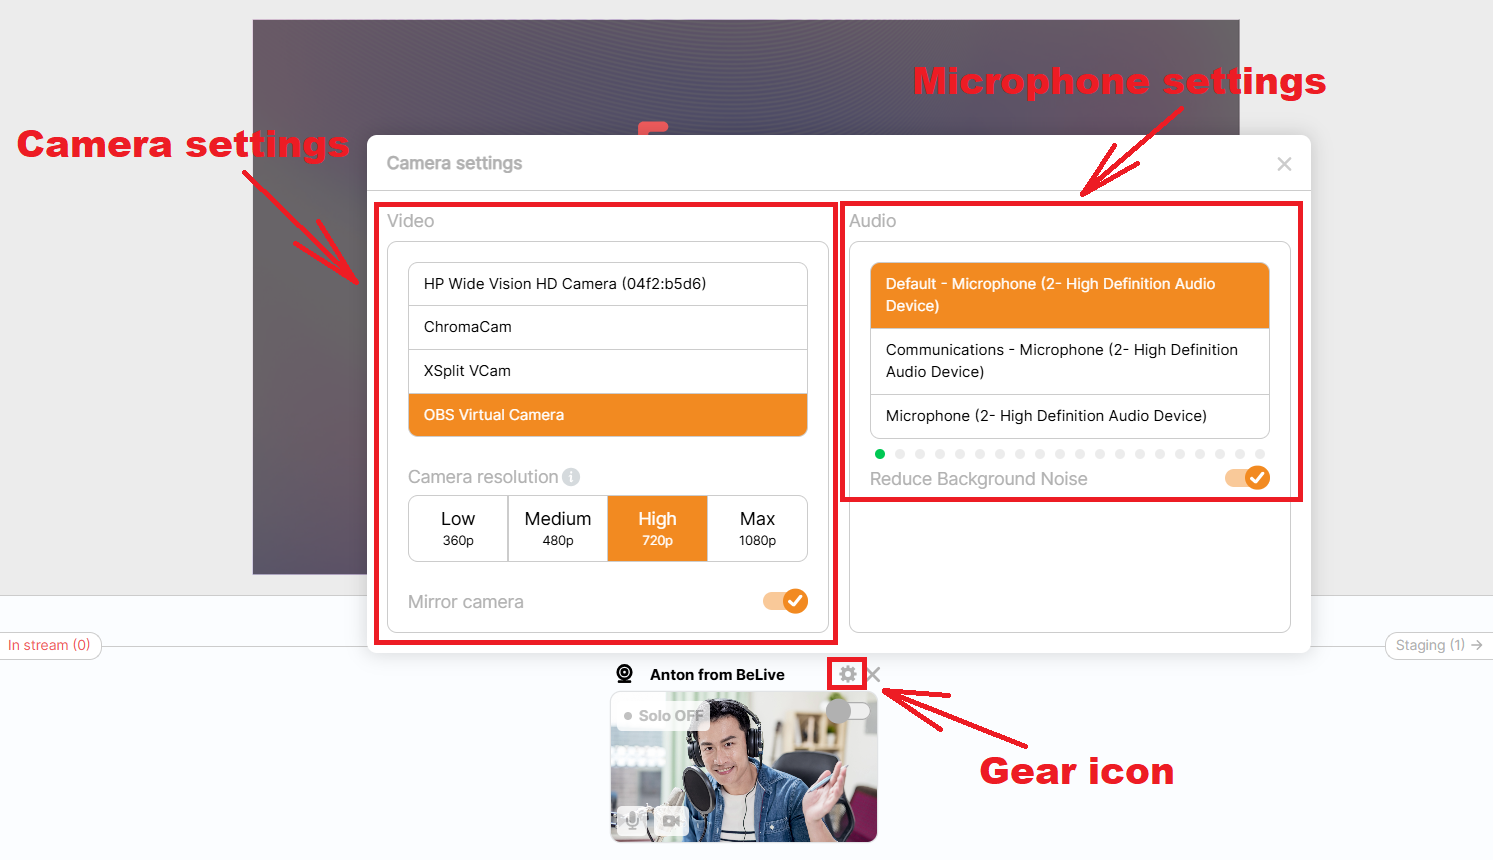
Check the settings/Switch resolutions
Once you connect your camera to the studio, click on the gear icon to open the settings window. A drop-down menu for camera & mic settings will appear. Switch between internal and external cameras/mics and test out different resolutions.
Lower resolution works better with a slower internet connection and older computers. If you're on a powerful device and your internet connection is stable, feel free to increase it to 720p.
Echo
An echo is caused when one person's voice is heard through another person's microphone. To avoid the sound from reaching the microphone, wearing headsets is a must for both the host and guests.
A good rule to remember: if you hear the echo, then it's NOT coming from your system. The person causing the echo DOES NOT hear the echo.
Unless the Be.Live studio is open in more than one tab, or your Amazon, Facebook, or YouTube live stream is open in another tab. That means the sound from it is picked up by your mic. Make sure you do not have that open during the stream or have it muted at least.
Poor sound quality
Reduce background noise toggle gives you the flexibility to choose how your stream sounds. Turn it on for clean, voice-focused audio — ideal for talk shows, interviews, and podcasts. Turn it off to capture the full soundscape of your room, including instruments, ambient sounds, and live music, with no noise filtering.