Most of us have experienced poor quality issues at least once while on the air - when the camera image becomes blurry and the audio gets the robotic effect. This is super frustrating since the issue affects not only the broadcast itself but also the host's reputation.
Broadcasting is a complex process influenced by many factors so you never know where to start. However, experience shows that most of the time, what causes these problems is connection.
First indicators of bad network quality
Network quality issues are tricky to clarify, but we have prepared a list of the most common changes your internet connection might cause.
- Long loading or/and lagging of the website
Changes you made in Studio are taking too long to apply? Do you see any flickering, lagging or other unexpected behaviour? While the network is not the only thing which causes this, it is worth checking your connection once you catch any of these. - Blurry video, pixelation, image freezes and quality changes during the broadcast
An unstable internet connection or drops in speed and bandwidth can impact the quality of your broadcast resulting in blurring or lowering resolution and other changes in the quality of your broadcasting image. - Sound lags, robotic voice, different talking speed
Image quality is not the only part of your broadcast which can be affected by network issues. An unstable network connection can also cause unexpected sound issues such as robotic voice or cutouts. While this can happen for various reasons, network quality is one of the most common. - Media files, presentations and other sources flickering, long loading or not appearing live
Just like your camera image and microphone sound, media files can also lag. If sources you add to your broadcast are not shown or are taking too long to appear on the screen, it is better to check your network quality and the files you used.
How to improve network quality
1. Use a wired connection
Even though your Wi-Fi indication may show you a stable signal, wireless technology usually provides unstable internet speed. Many factors may impact the quality of the wireless internet connection, which is why we recommend using an ethernet cable.
A wired internet connection provides a more stable connection and better bandwidth. If using the direct connection is inconvenient or not possible, you can use a cable to connect your device to a Wi-Fi router before streaming.
2. Check your internet speed
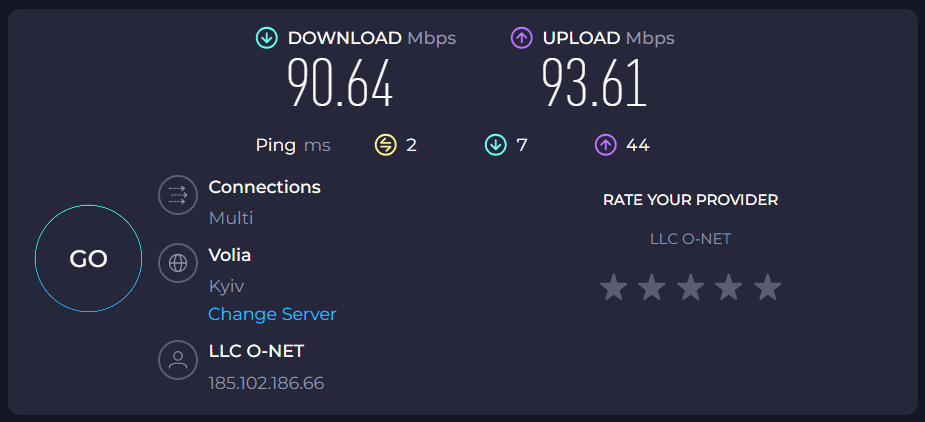
Be.Live doesn't have specific requirements for the speed of your internet connection for going live. However, we recommend having more than 20Mbps of the upload speed and a stable speed overall.
Here is the link to run the test: http://speedtest.net
During the speed test, two lines will show the stability of your internet speed. You can see an example of a stable internet speed below.

Once the test is done, the website will show your final results.

You can screenshot them to provide the Support Team with this information.
3. Try off-peak hours
Internet speed from your provider can be significantly lower when everyone comes back home and starts using the same provider. For example, you can start your live broadcast during business hours, rather than in the evening or go live later in the night.
4. Close all unnecessary tabs and background applications
All apps running on your device require a portion of the internet connection to stay active, which can reduce bandwidth and internet speed for your broadcast. They can also lower your device's performance even if they are working in the background. The same works for the browser tabs you have opened.
We recommend quit the apps and close the tabs you don't need during the live session to improve your internet connection and device performance.