To check your audio (microphone) and video (camera) settings within Be.Live, click the gear icon above your camera image:
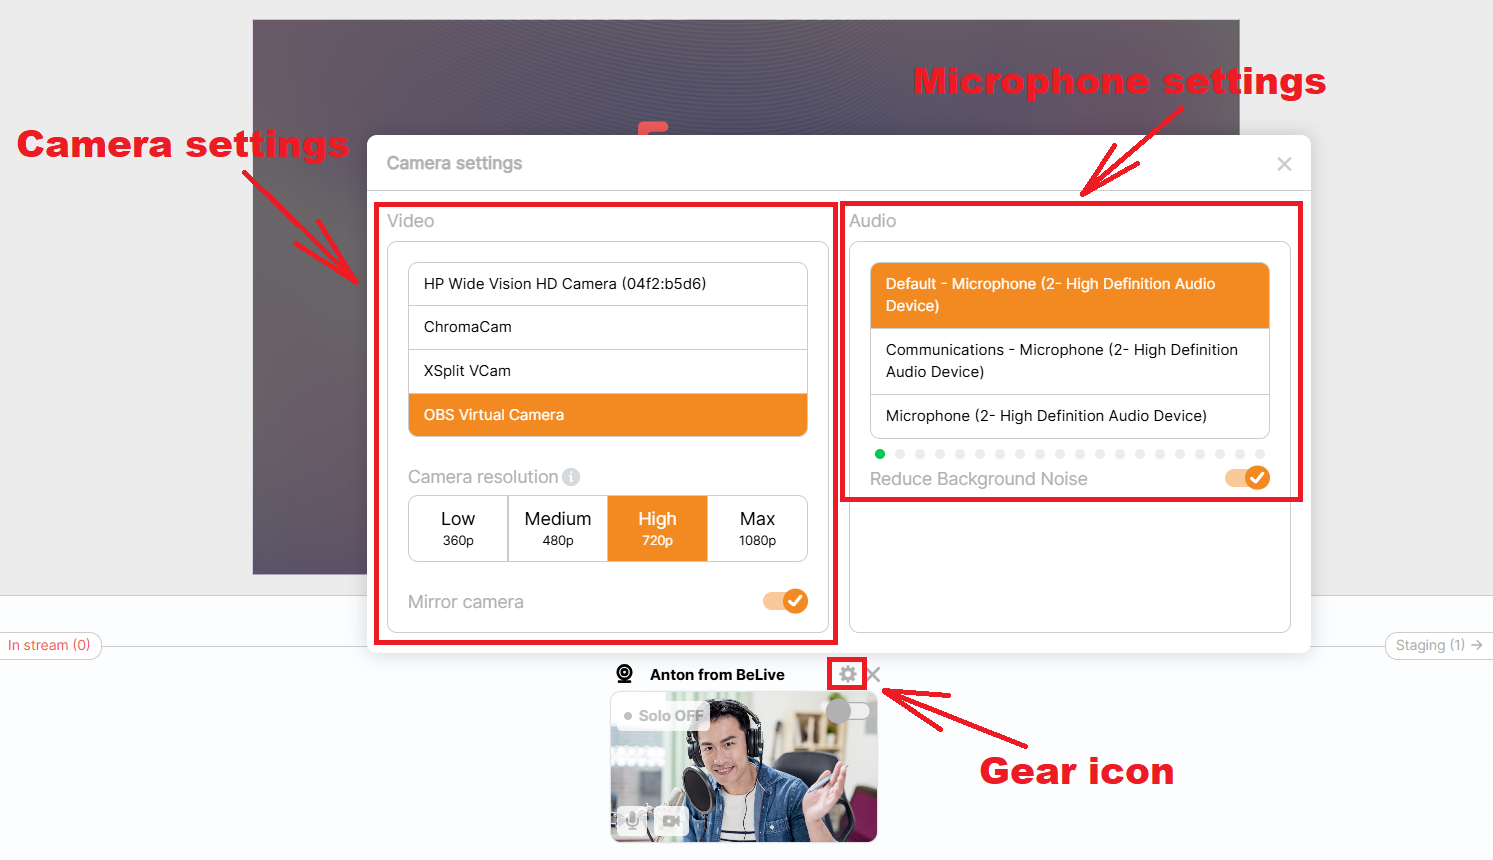
Video Settings
Select the internal/external camera you wish to use for your broadcast. Note that you can only use a webcam to broadcast with Be.Live. You may also use your smartphone as a webcam.
Camera Resolution
4 resolution options are available to use: 360, 480, 720p and 1080p (available on the Pro and Growth Plan). The default resolution is set to 480. Lower resolution works better with slower connections and older computers. If you're using a powerful device with a stable internet connection, feel free to increase it to 720p or 1080p.
Camera mirroring
You can select whether you want to mirror your camera image or not. This feature is also available for the guest!
Microphone
Select the microphone you wish to use. If the sound indicators move when you speak, that means the microphone is working.
Speakers
Select the speakers you wish to use. We suggest not setting it at a very high volume and to use headphones in order to avoid echo. You may also choose to play test sound to ensure your speakers or headphones work properly.
Reduce Background Noise
Reduce background noise toggle gives you the flexibility to decide how your stream sounds. Turn it on for clean, voice-focused audio — ideal for talk shows, interviews, and podcasts. Turn it off to capture the full soundscape of your room, including instruments, ambient sounds, and live music, with no noise filtering.