Facebook Live Streaming Requirements
To go live on Facebook, you need to meet these requirements:
- Your Facebook account and Facebook Page must be at least 60 days old.
- For creators and businesses using Pages or professional mode for profiles, you also need to have at least 100 followers.
Video Tutorial
Want to announce your Facebook broadcast a few days in advance? Here's how to do it from the Be.Live studio.
Related video tutorial: How to Stream with Be.Live - A Complete Tutorial [YouTube]
How do I schedule a Facebook broadcast?
.gif)
-
Log in to your Be.Live account using the latest version of Google Chrome or Safari.
-
Click Set Destination on the top left section of the studio.
-
Enable the Schedule Stream toggle.
-
Set your intended broadcast date and time. You may schedule a broadcast up to a year in advance.
-
Select Facebook as your broadcast platform then select a specific destination (timeline or any page that you manage). If you cannot see your page in the list, click here. If you're using Safari, check the bottom of the article for additional steps.
-
Upload a cover image or create a custom image using our Graphic Generator!
-
Add a broadcast title and description.
-
Hit Save.
You can schedule several broadcasts on Be.Live. To do so, simply press Create new stream when you're checking destination settings and set it up using the instructions above.

How do I access or edit my scheduled broadcast?
Click Scheduled streams and select the broadcast from the dropdown menu:
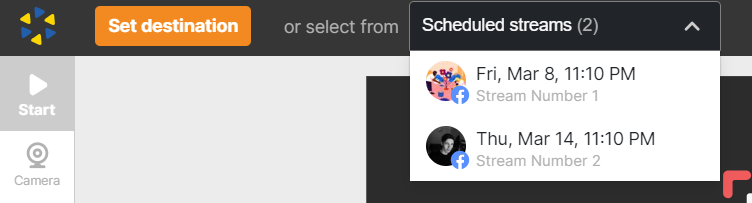
Once selected, stream settings will appear on the left side of the studio.
From here, you can change the time/date, cover image/thumbnail, title/description, and add or change the destination.
Hit Save to apply any new changes. Click anywhere outside the Destinations section if you have not made any changes.
How do I start my scheduled broadcast?
After accessing your scheduled broadcast, click Camera from the toolbar to push your webcam to the staging section:
Click Show in Stream to push your camera to the broadcasting section.
Afterwards, click Start to begin your broadcast. A 3-second countdown will appear to signal the start of the stream. To end your broadcast, click the stop button:
Will my scheduled broadcast go live automatically?
No. It only serves as an announcement to your viewers about an upcoming broadcast. You need to start it manually.
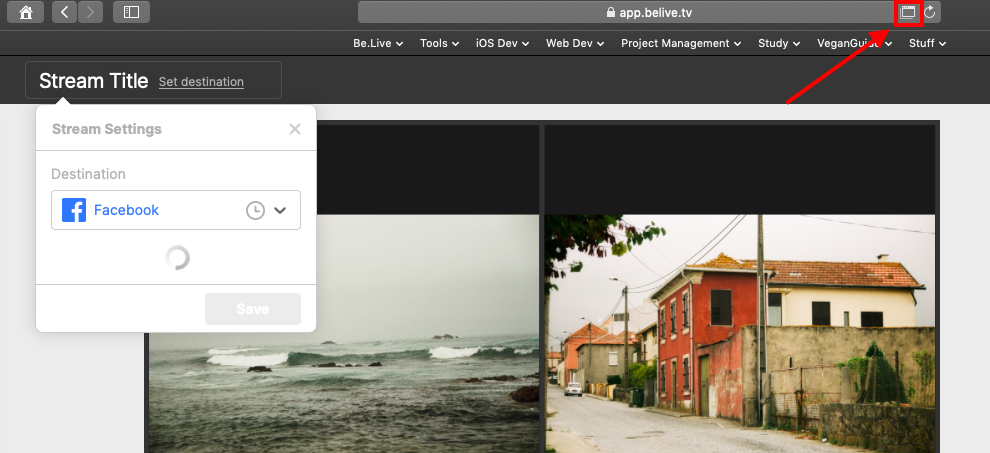
Using Safari browser
If you are trying to set your broadcast destination to Facebook but see a spinning wheel instead, click the icon shown below to grant permissions for Facebook:
Other things to know
-
If you want to stream a scheduled show with Be.Live, it needs to be scheduled directly from the Be.Live studio. It is not possible to link a show that was previously scheduled on Facebook.
-
The initial link that is created right after scheduling on the My Streams page leads to your page/timeline with the broadcast. The link directly to your stream will be created once you have started broadcasting and will automatically change on the My Streams page. It will remain like this after the broadcast so you can share it at any point.
-
You are required to start the broadcast within 10 minutes after the scheduled time. Alternatively, you may also start the broadcast earlier.
Cover image guidelines
-
Supported formats - .jpg or .png
-
Size - up to 3mb
-
Ratio - 16:9 (i.e. 1920x1080, 1280×720, etc.)
-
File name - no symbols or special characters
Want to create a cover image for your show? Click here to learn more about our Graphic Generator feature!
Related articles:
How to Check Camera and Microphone Settings Inside the Production Studio
How to Download Broadcasts from Be.Live