Are you used to OBS or Ecamm but would still like to use our unique features, such as the Amazon product carousel or comment on the screen, to increase engagement? Now you can connect Be.Live as an overlay to your Studio to achieve this!
In this article, we will cover the following:
1. How to enable OBS/Ecamm mode in Be.Live and set everything up
2. How to connect Be.Live as an overlay in OBS
3. How to connect Be.Live as an overlay in Ecamm
4. Going live
How to enable OBS/Ecamm mode in Be.Live and set everything up
1. Go to Stream settings → OBS/Ecamm → and enable the toggle: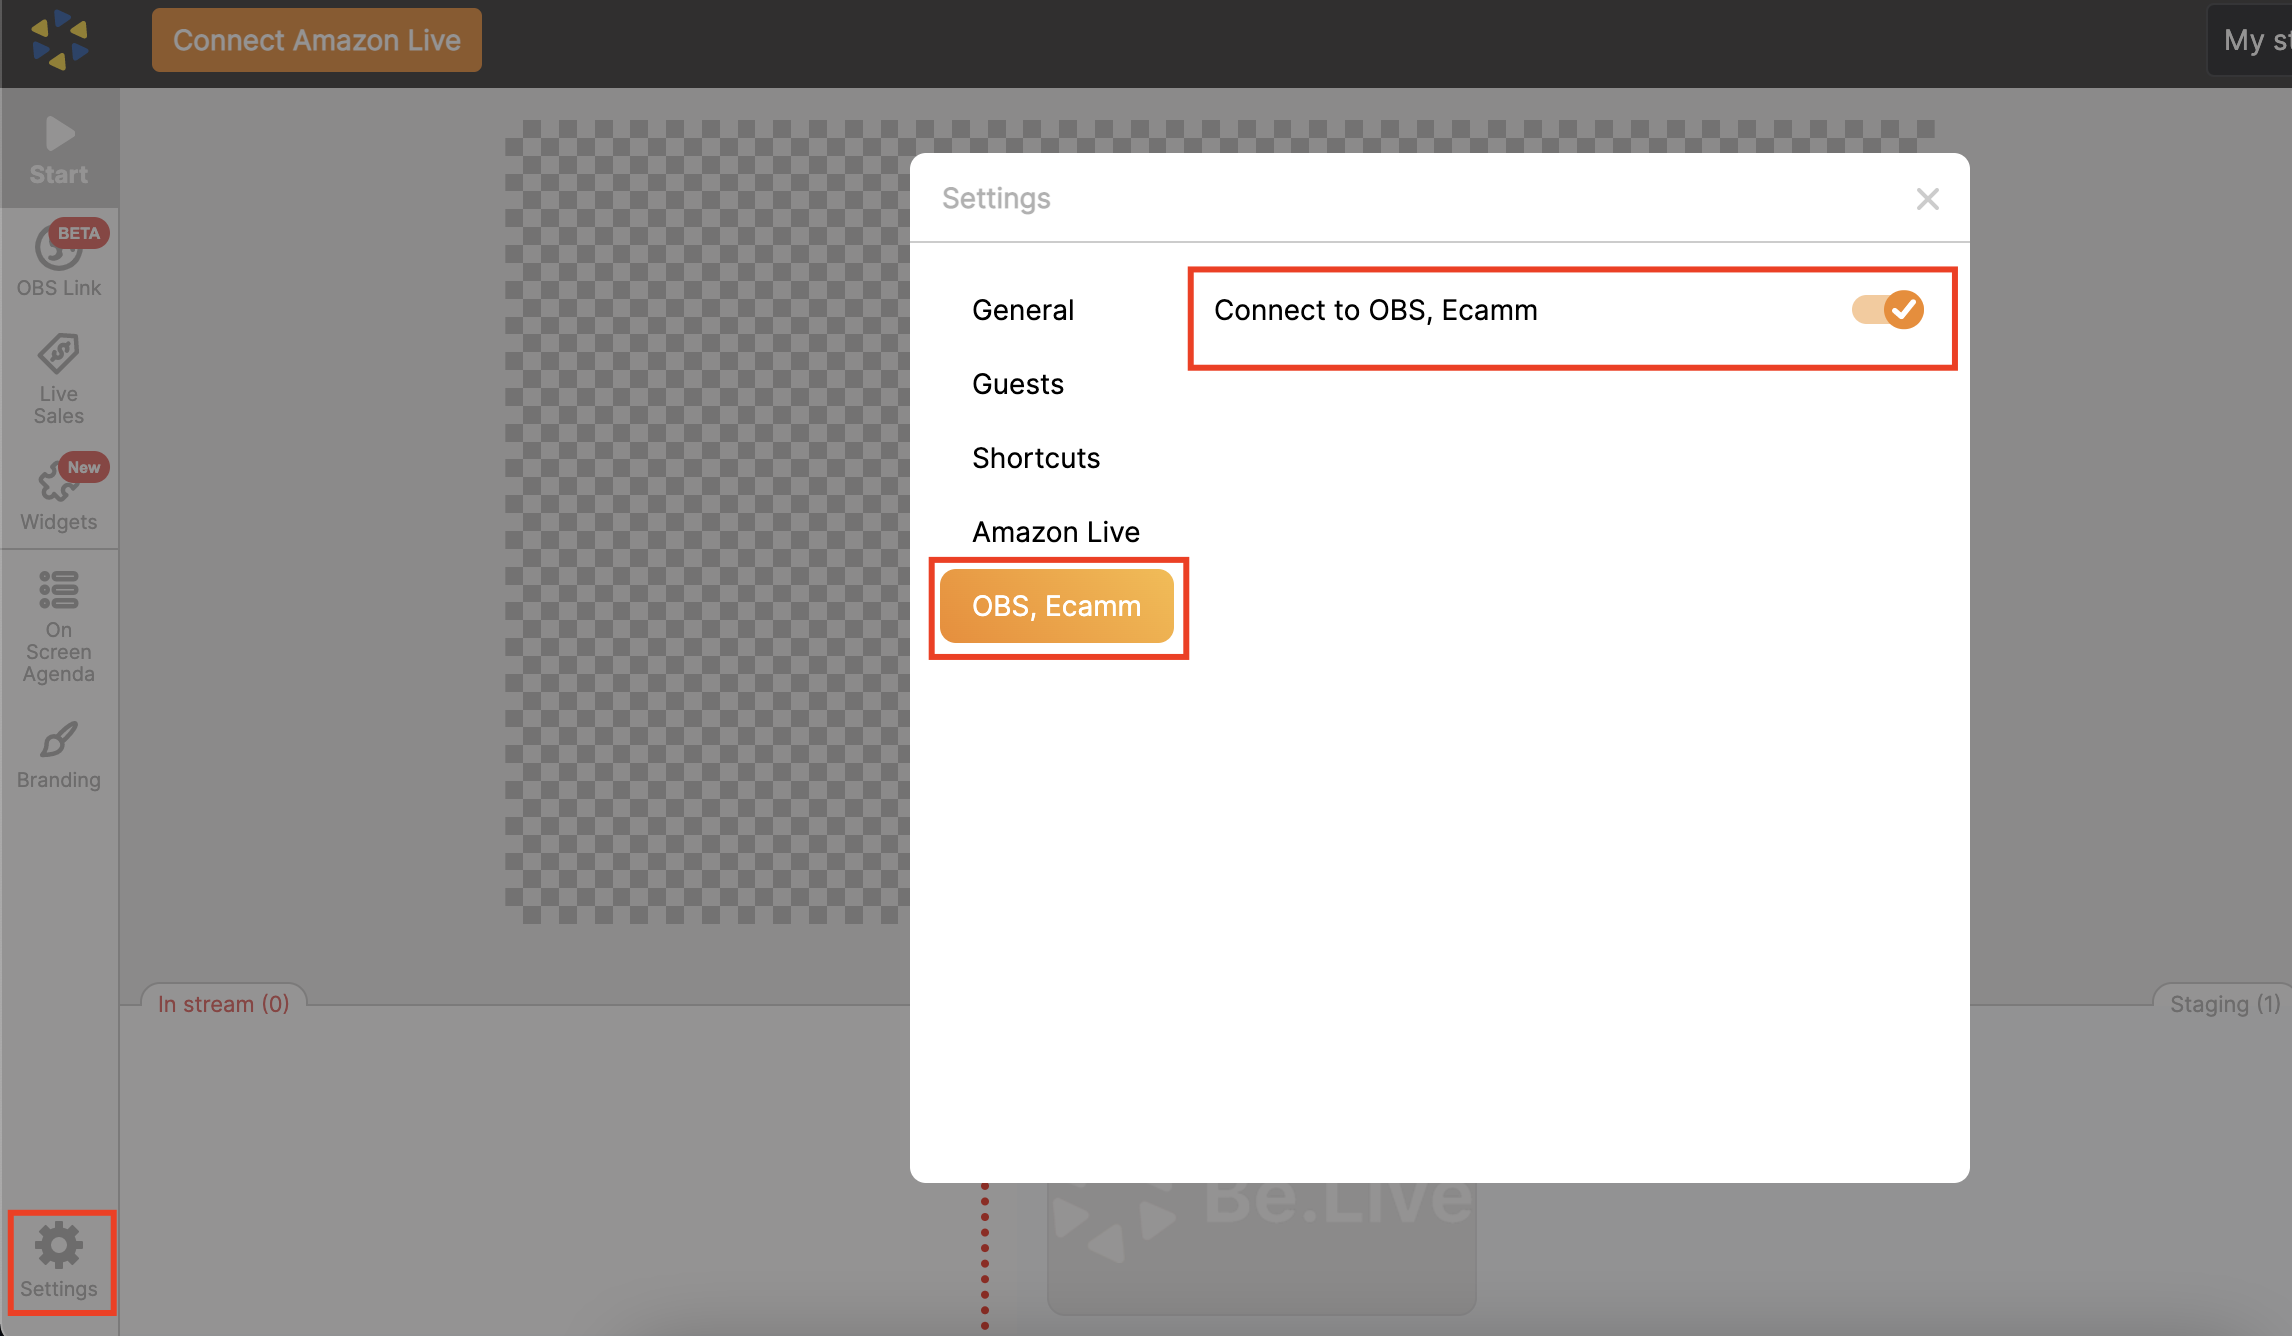
After this, you will see a transparent preview and different icons on the left panel, including a new one: OBS link.
2. Now, you can create an overlay that will later be used in OBS/Ecamm. Features that can be added:
- Widgets
- Branding elements
- On-screen agenda (title/crawler)
- Comments on screen
- Product carousel / Live Sales
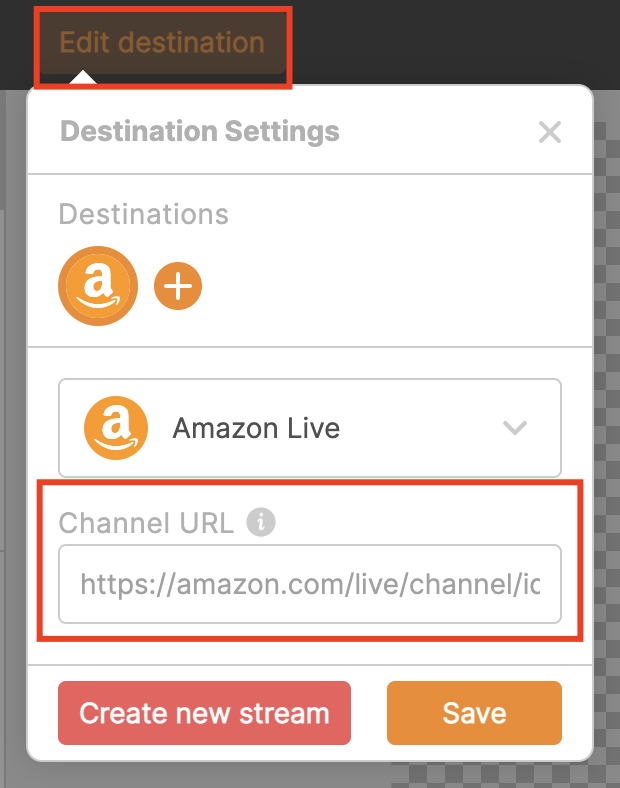
3. Once you have added all desired elements in the Studio, go to destinations → Select Amazon Live → Add your Channel URL.
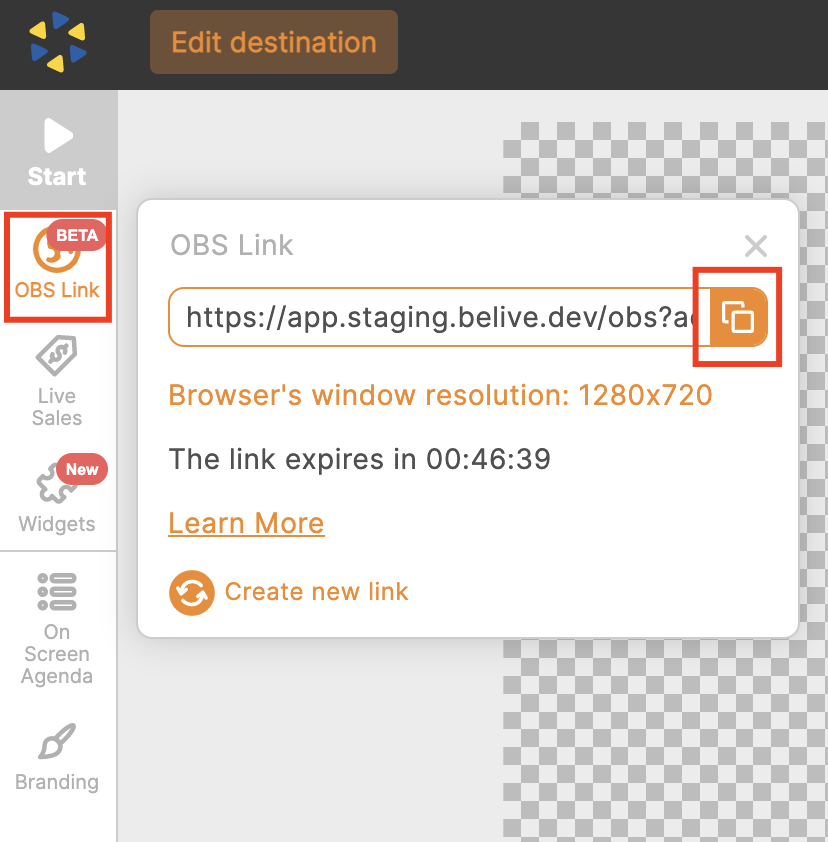
Then go to the toolbar and click on OBS Link → Copy link to clipboard
How to connect Be.Live as an overlay in OBS
Let's set up the OBS app now! If you don't have OBS installed yet, you can download it here.
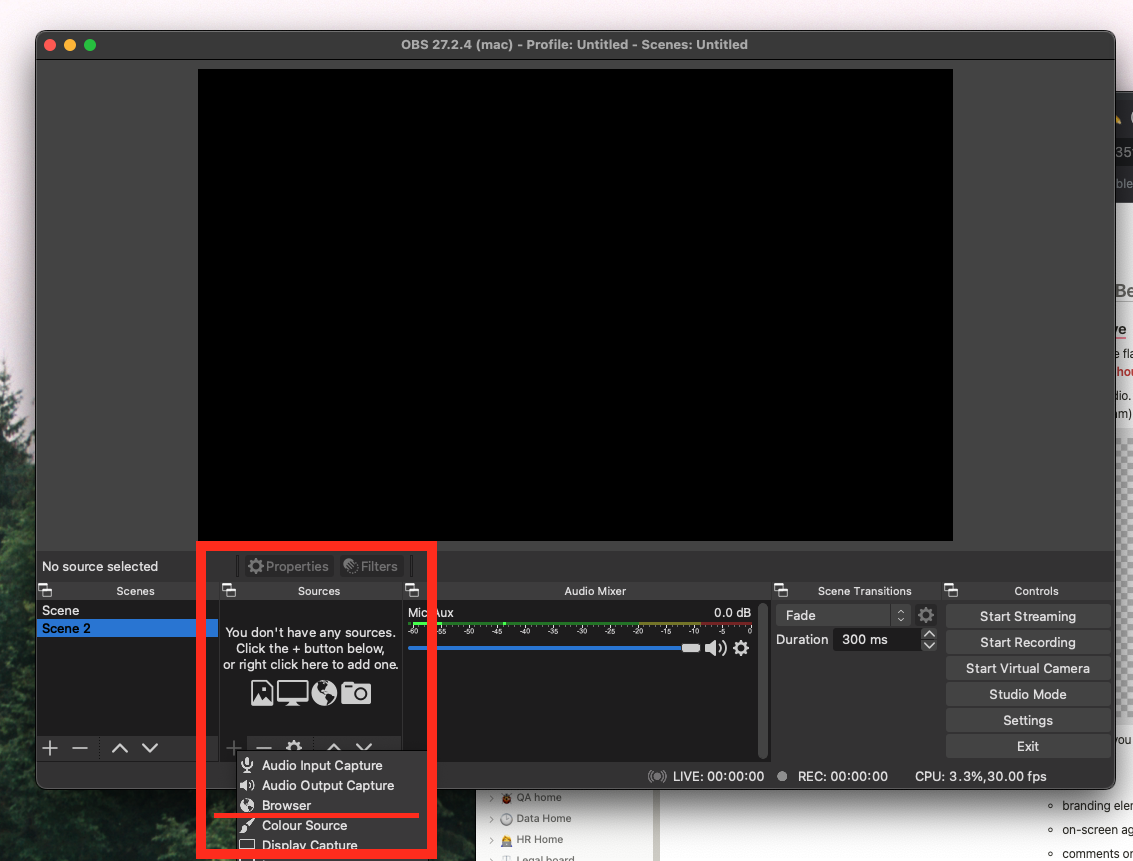
1. Once OBS is installed, open it and go to the Sources, click on the + button, and select the Browser option:
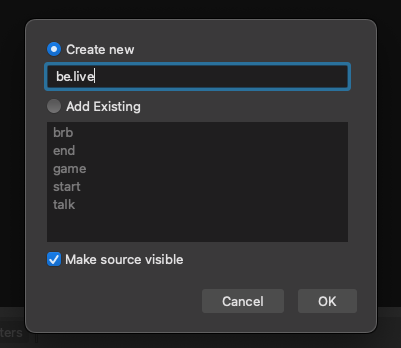
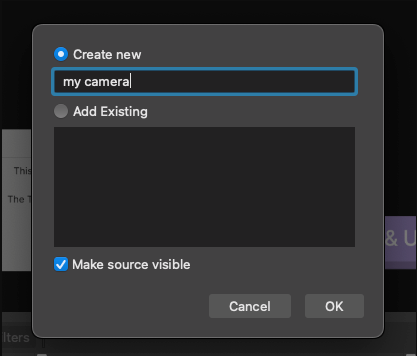
2. After that, tick the Create new option, make sure that Make source visible is checked, and press OK:
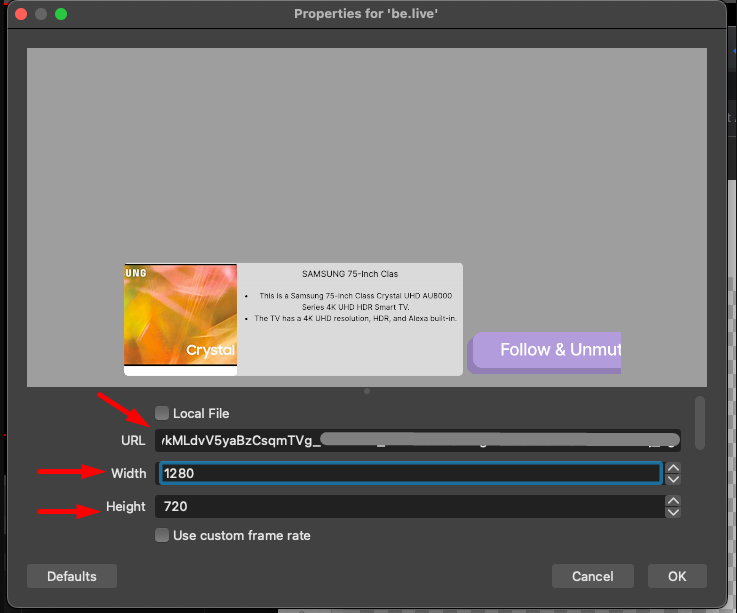
3. Then paste the URL you copied in the Be.Live Studio, type 1280 under Width and 720 under Height and press OK:
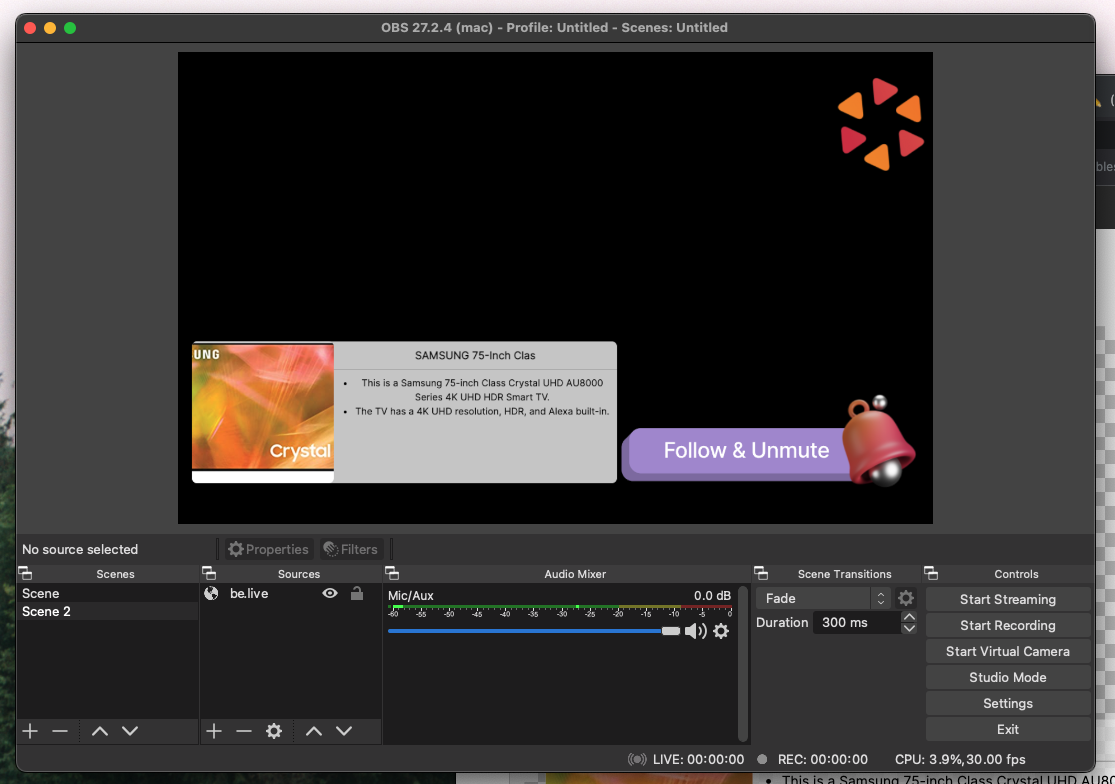
After you do all the steps above, you should see all the elements you have added to your Be.Live Studio in OBS studio. If you change anything in Be.Live Studio, changes will also appear in OBS:
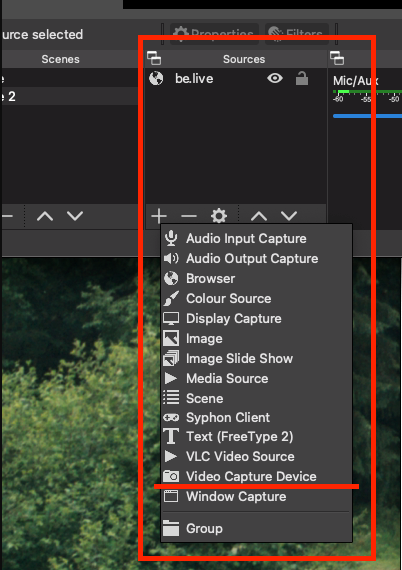
4. Now, let’s connect the camera! To connect your camera, go to Sources and click on the + button, then select Video Capture Device, click Create new, and check the Make source visible button and save the changes by Pressing OK.
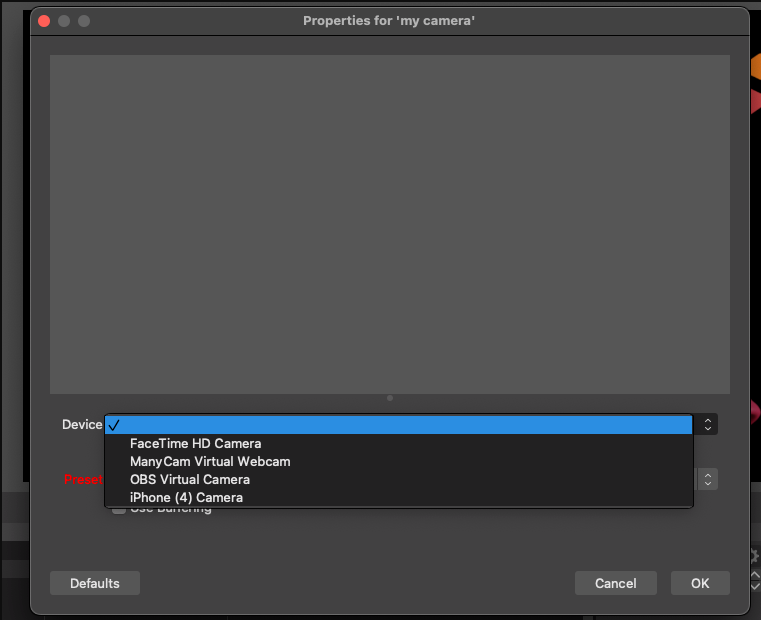
 After that, select camera from the dropdown and press OK:
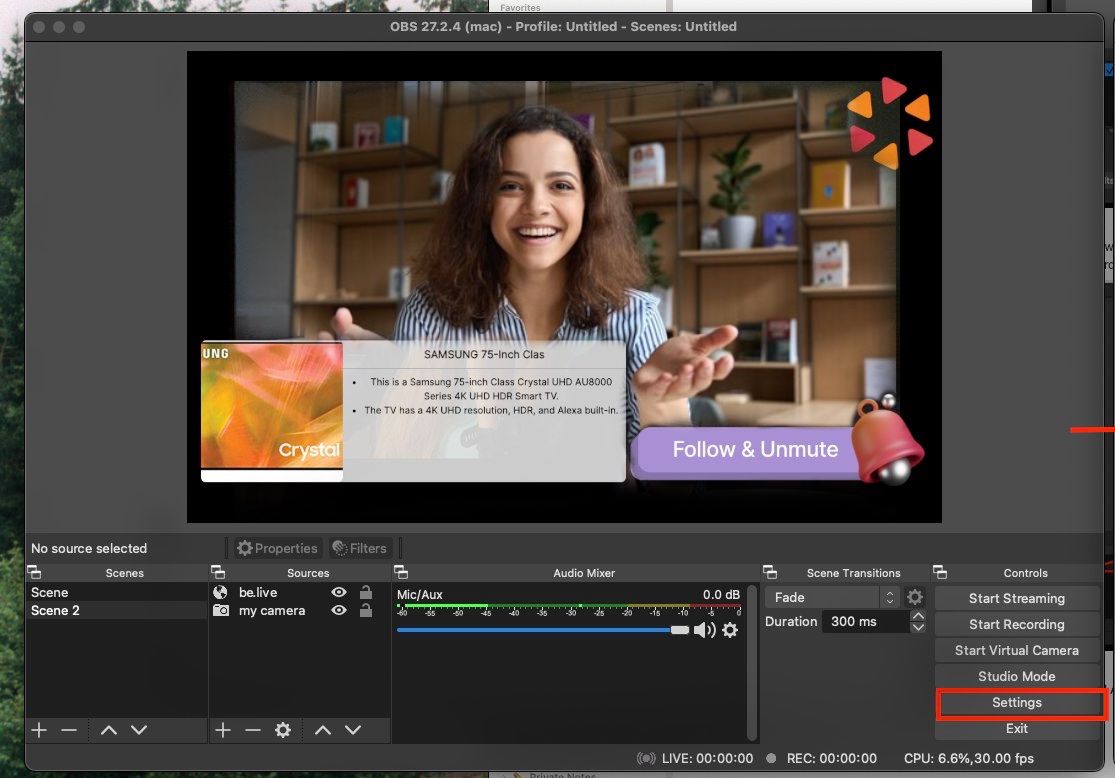
Your camera will appear at the top, so you need to reorder your sources. To do that, drag the Be.Live source and drop it above your camera source:

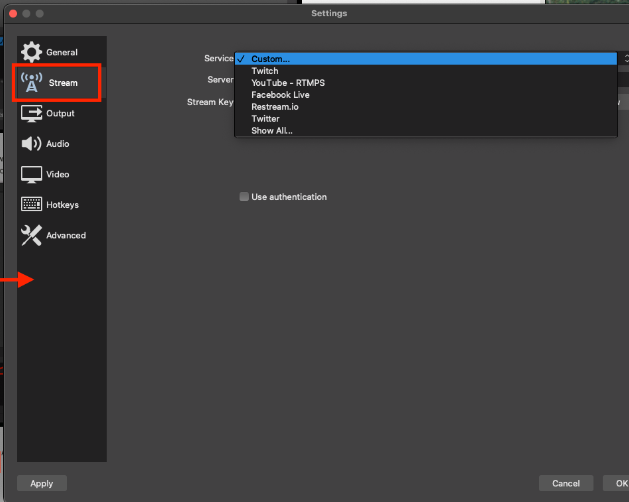
5. Now, let’s add Amazon Live destination in OBS. For doing that go to Settings, choose Streams and select a Custom option under Service and paste your Amazon account Server URL and Stream Key and click on OK:
How to connect Be.Live as an overlay in Ecamm
Using Ecamm instead of OBS? This solution will work for you too! Let's set up Ecamm with Be.Live overlay. If you don't have Ecamm installed yet, you can download it here (MacOS only).
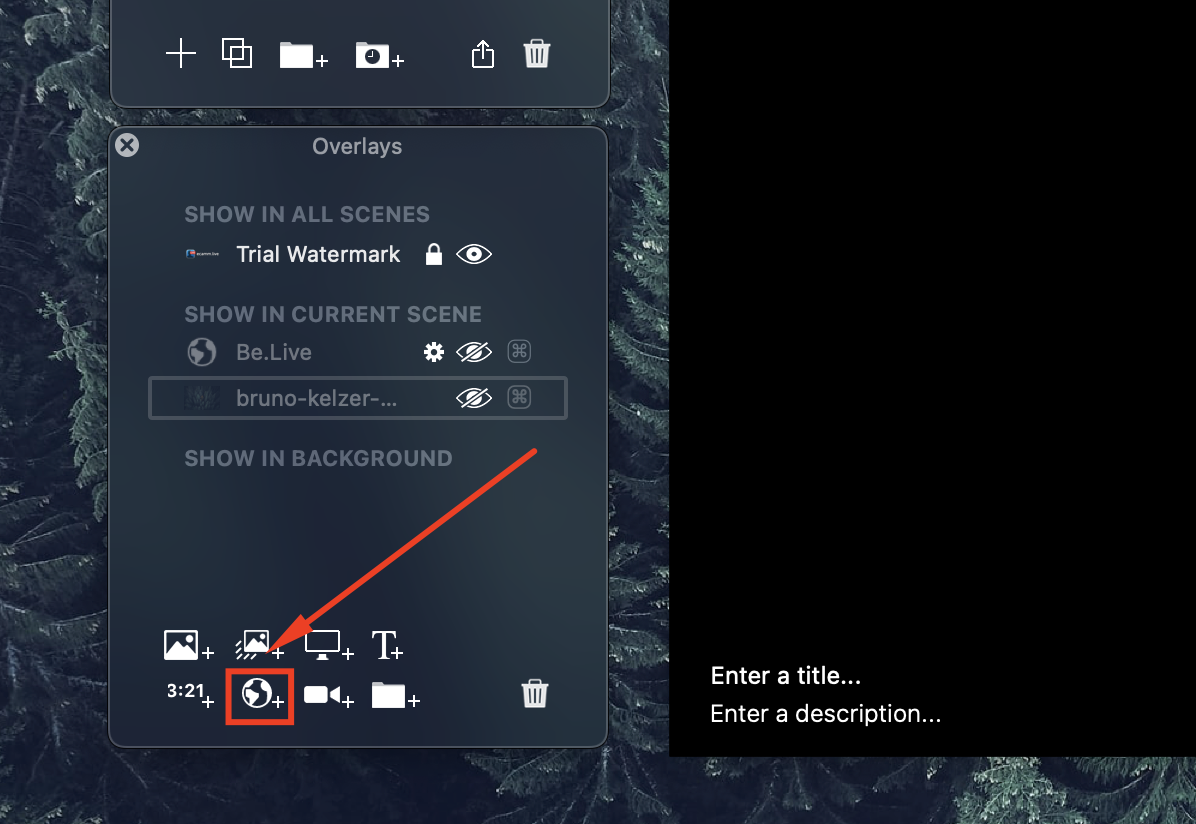
1. Once Ecamm is installed, open it and go to the Overlays window and select the Browser option:
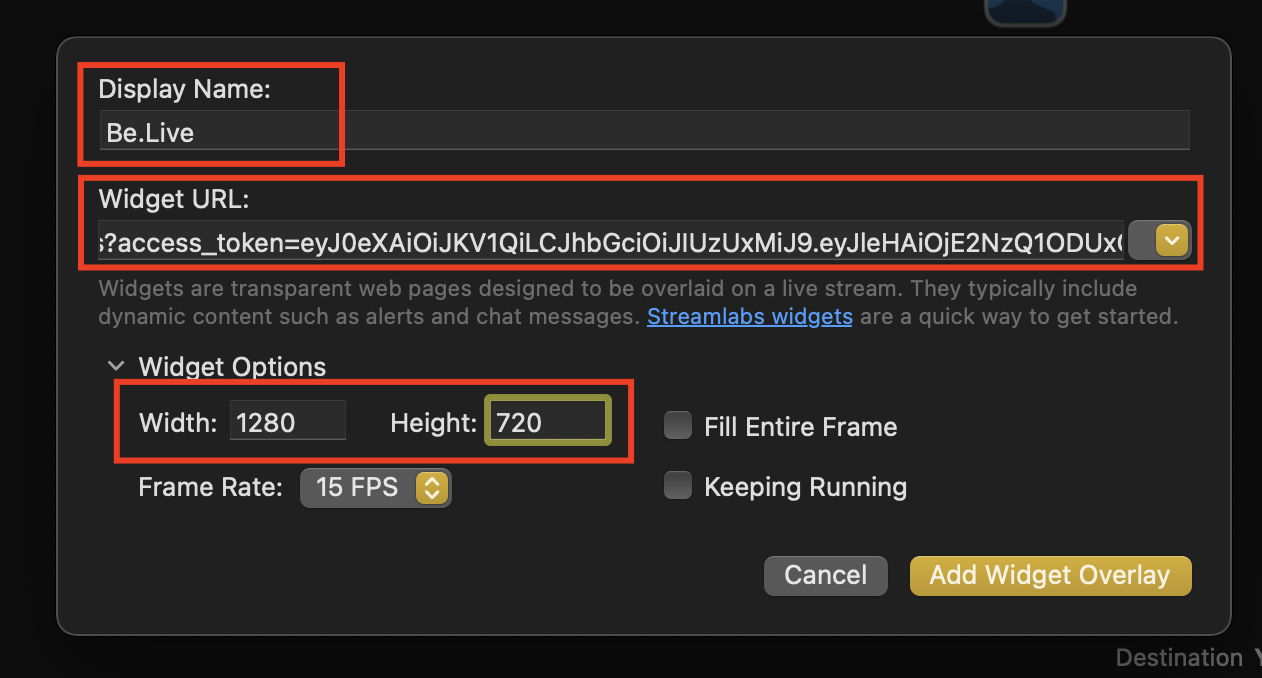
2. After that, add a name to your overlay, then paste the URL you copied in the Be.Live Studio, type 1280 under Width and 720 under Height and press Add Widget overlay:
3. After you do all the steps above, you should see all the elements you have added to your Be.Live Studio in Ecamm app. If you change anything in Be.Live Studio, changes will also appear in Ecamm:
4. Now, let’s connect the camera! To connect your camera, go to Overlays window and click on the camera button. You can select the needed camera by clicking on the gear icon next to the camera source.
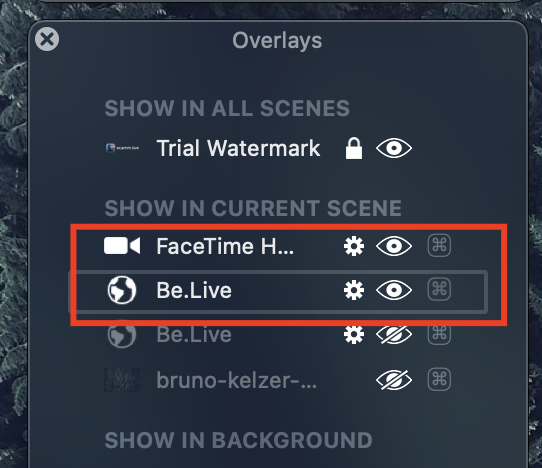
5. Your camera will appear at the top, so you need to reorder your sources. To do that, drag the Be.Live source and drop it above your camera source in the Overlay window:
6. Now, let’s add Amazon Live destination in Ecamm. Click on Destination in the right bottom corner of Ecamm Studio and select a Custom stream key option and paste your Amazon account Server URL and Stream Key and click on Use Custom Stream Key:
Going live
1. If you're using OBS, go live by pressing Start Streaming button:

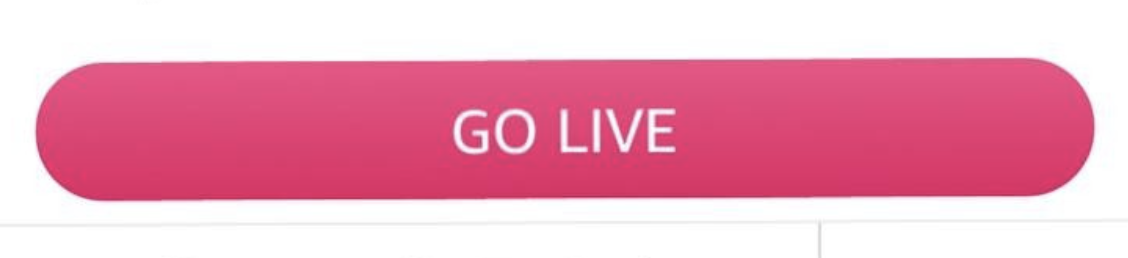
2. If you're using Ecamm, click on Go live: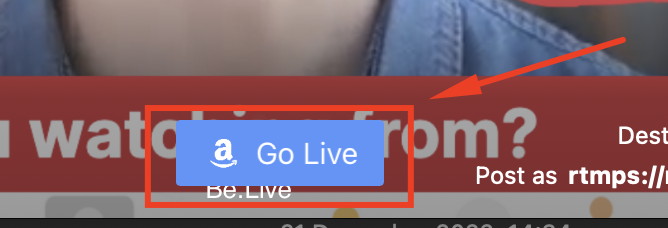
3. Go live in Amazon Live Creator App. Click on Preview —> Go live:
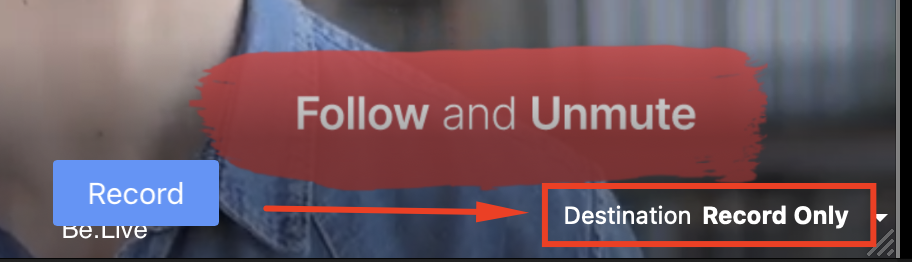
3. Go live in Be.Live to manage the overlay. If you want to get an Amazon product carousel and comments, go live in Be.Live as well by clicking on the Start button.
❓ FAQ
-
Why do you need this solution?
That can be a good solution if you're used to OBS/Ecamm, but want to use Be.Live unique features, such as the Amazon product carousel, comment on the screen, comments snake widget, etc.
-
Do I need to go live on all three platforms?
If you want to show comments on the screen and get the Snake widget, you will need to start the stream 3 times from different platforms (OBS/Ecamm, Amazon and Be.Live.)
If you don’t need comments or Snake, going live in OBS along with Amazon will be enough.
-
Where do I manage my stream?
Both Be.Live and OBS/Ecamm. OBS/Ecamm for stream management and Be.Live for managing Be.Live functionality.
⚠️ Rules to remember
- All the changes you make in Be.Live Studio before/after going live will be applied to your OBS/Ecamm overlay automatically.
- The OBS link is valid for 24 hours then, you will need to generate a new one and update it in your OBS browser source.
- Those streams won’t be recorded on Be.Live.