How To Go Live On Amazon Live With Be.Live Video Tutorial:
Are you a seller or business owner looking for efficient ways to advertise your product to a big audience? Or maybe you are an influencer looking to promote and recommend the products that you use? Amazon might be your perfect tool!
Set-up
To go live, you need the following:
-
Desktop computer or laptop
-
An iPhone or iPad
-
The latest version of Chrome or Safari browser
-
Web camera
-
Stable internet connection to avoid lags and delays. We recommend using a hard-wired connection (ethernet).
-
A pair of headphones to avoid echo and feedback
-
You are an Amazon Influencer (learn how to apply here) or you have a professional Amazon Seller account and you're registered in Amazon's Brand Registry (learn more about it here and here).
Setting up your broadcast
Step 1:
Download the Amazon Live Creator app. This software is needed for setting up a stream. Currently, the app is only available on the IOS system.
Step 2:
Log in to your Seller Central or Brand Registry account.
Related video: check out the complete YouTube overview of the process here.
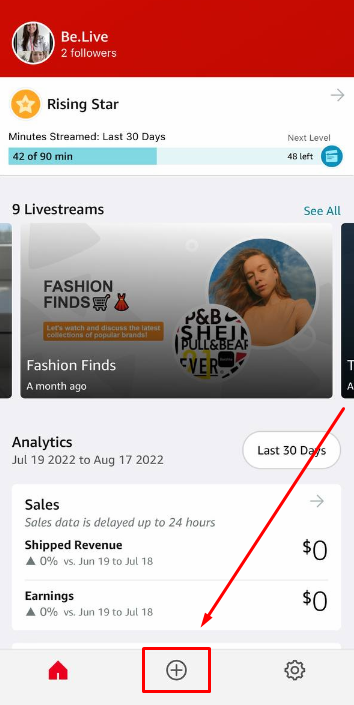
Step 3:
Create the Show using the + Button at the bottom of the screen.
Step 4:
Add a show card and a title. Here you're required to add your show's thumbnail, products to advertise, and a title.
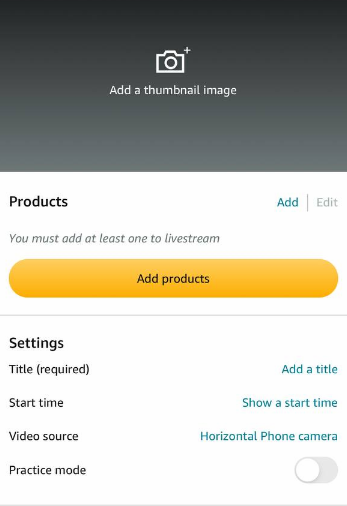
Note: you can create Idea Lists to simplify and categorize the products that you are going to advertise.

Step 5:
After adding all the show info, it's time to schedule it. Once you're done, a notification will appear about the upcoming show. You can also skip that step if you're planning to go live right away.
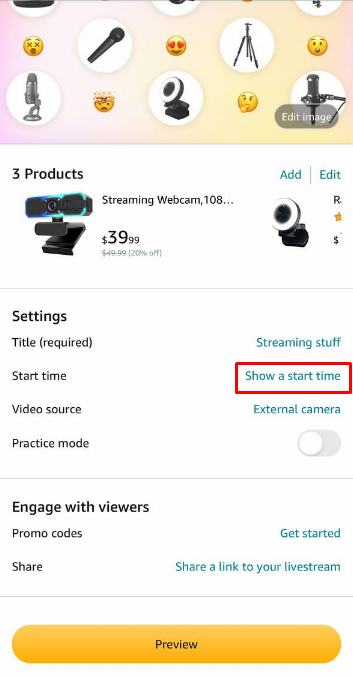
After clicking the "Save" button, you will see a preview window with the information about your broadcast. You can change the picture, title, products, and scheduled time at any time before you actually go live.
Step 6:
Switch from the phone camera to an external source. At this point, you need to copy the Stream Key, which you will later insert in your Be.Live studio.
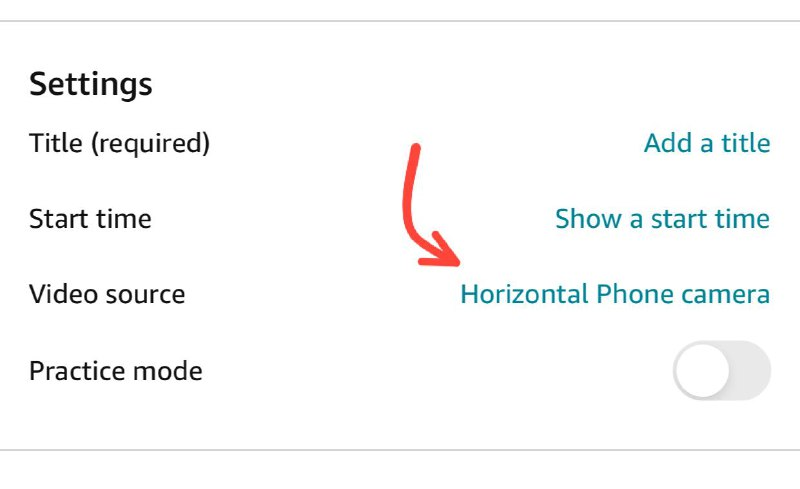

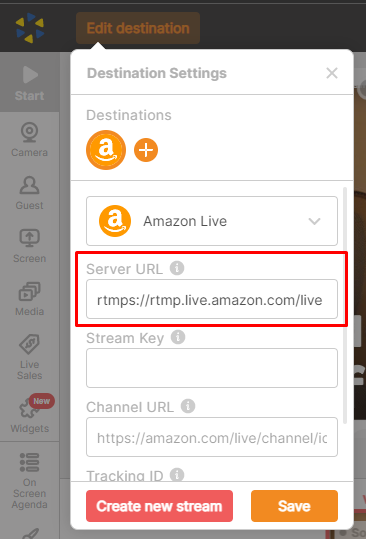
Note: There is no need to copy and paste the Source URL to the Be.Live Studio, as it automatically appears when you choose Amazon Live as your destination!
💡Tip: you can email yourself or share your broadcast credentials to your private messages on social media to have easy access and get back to them anytime, as the Stream key doesn't change.
Step 7:
After copying the Stream Key, you should also copy the Channel URL to get comments, viewers count, and new followers from your broadcast. You can find the Channel URL by going to your Shop, clicking on View all my past live streams and then copying the full link from the address bar:
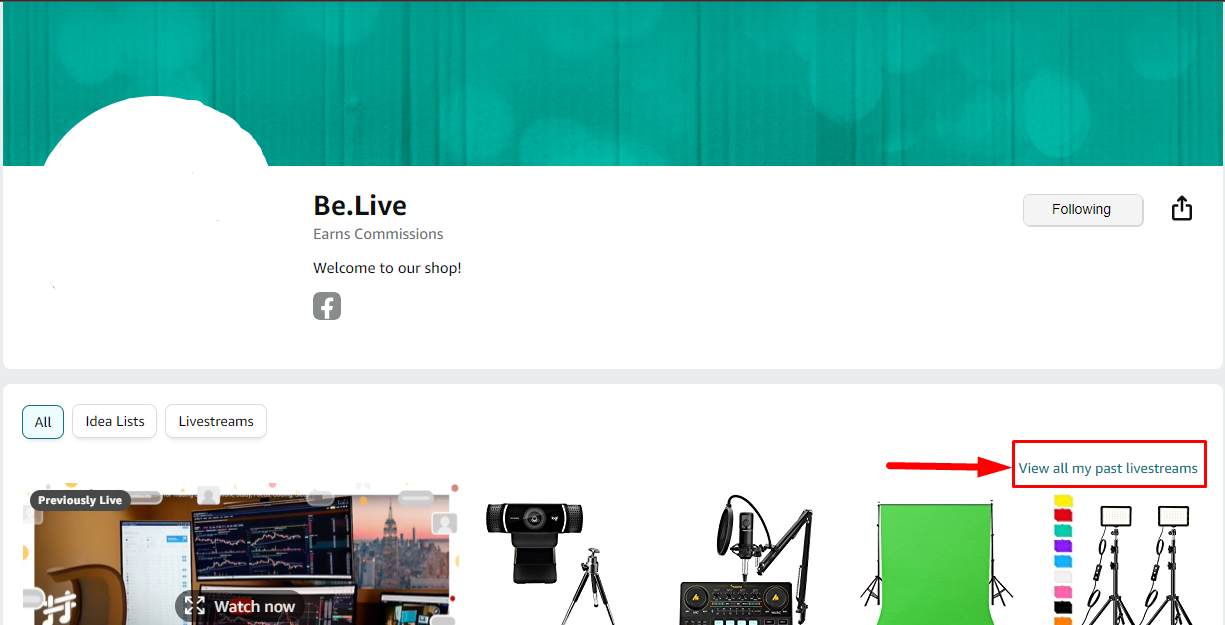
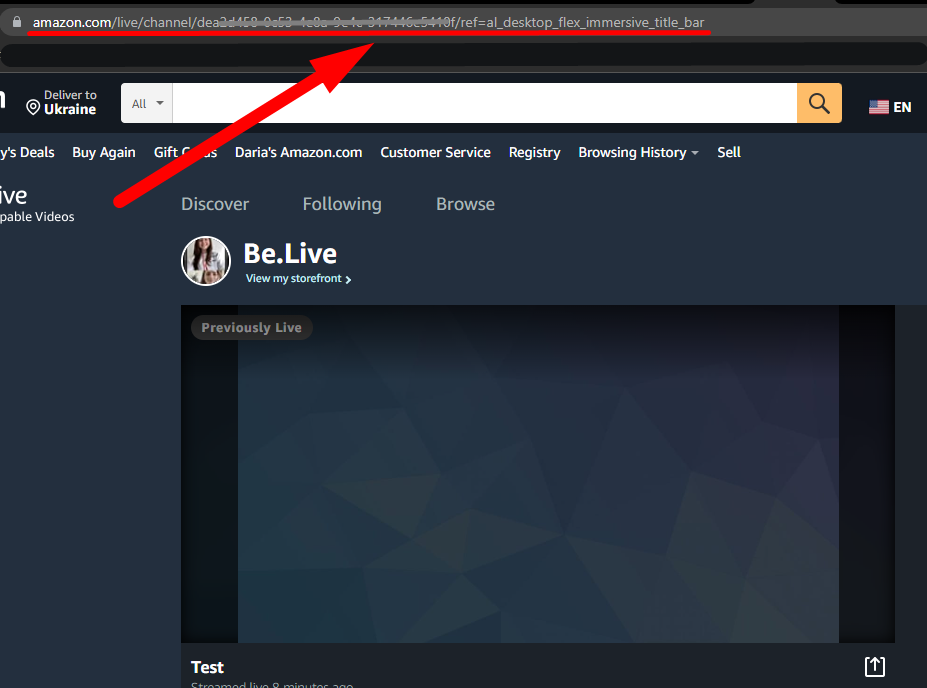
You'll need this link to start a stream from Be.Live.
Note: You can send this link to yourself in messengers or email as the Channel URL also doesn't change.
Step 8:
Now it's time to head over to your Be.Live studio and set up a broadcast there.
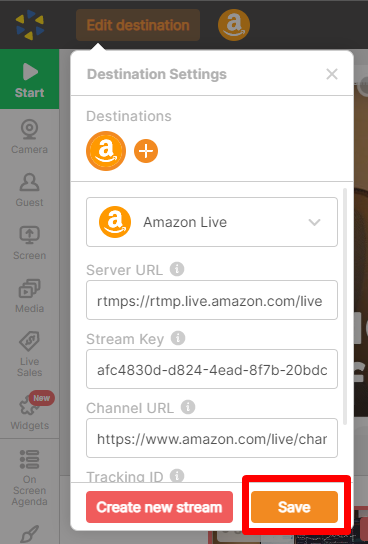
Select Amazon Live destination and insert the Server URL and Stream key from the previous step. Also, insert the Сhannel URL and click on "Save".
If you wish to schedule your broadcast, you can learn how to do that here.
This article will guide you through the process of creating/finding a Tracking ID on Amazon.
At this point, you can also create a simulcast broadcast and stream to different destinations along with your Amazon one.
Make sure that you have at least one source added to the stream, and click the green Start button in your studio.
Step 8:
Go back to your Amazon Live app and click on "Preview" —> "Go live".
💡 Tips on Amazon Live streams:
-
Make sure you have a good quality camera & mic, and good lighting;
-
Produce original & helpful content for your viewers;
-
Try longer stream durations (60+ minutes is preferred);
-
Interact with your viewers to make the show more engaging;
-
Use widgets to encourage users to follow you and unmute the stream;
-
Show products that you own or have experience with (you are expected to have 75% of the products displayed either physically on hand or as a video b-roll of you using the product);