Overview
With Be.Live, you have 2 options of creating a podcast:
-
Create an offline recording and use its audio for your podcast; OR
-
Stream a live broadcast and extract the audio file afterwards
You can go live on Amazon, Facebook, YouTube, LinkedIn and many other destinations and then download the audio. This would allow you to appeal to a new audience, grow your community and broaden your creative value.
In this article, you will learn how to start a recording without going live and downloading the audio file for your podcast.
Setting up
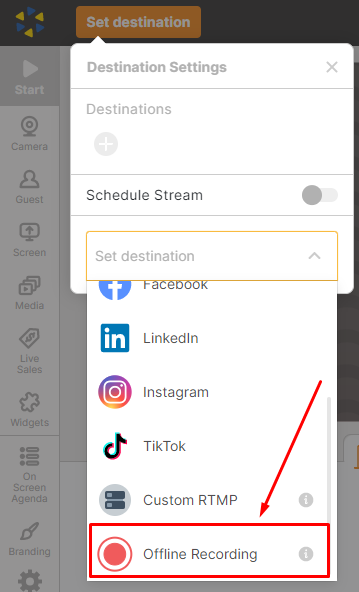
To start off, click Set Destination and choose Offline Recording.
.png)
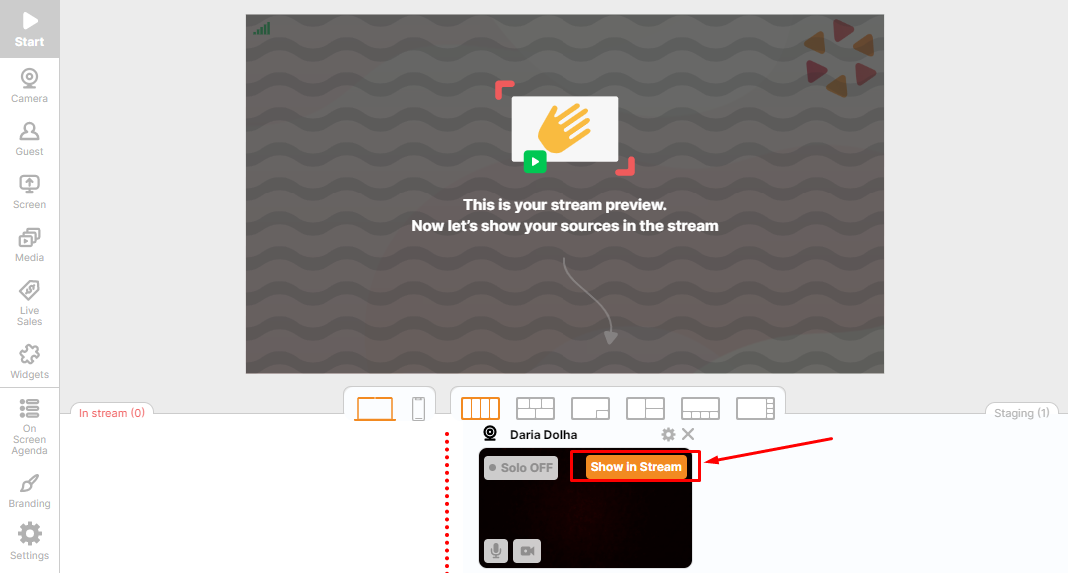
Add your camera to the Studio. Once all is set and guests have joined, push sources to the stream by clicking the orange button Show in Stream in the top right corner.
.png)
You also have the choice to disable your guest's mic. Simply select Mute on their camera source.
To start recording, press Record from the toolbar on the left. When you're ready to stop recording, use the same button to end it.

After the broadcast is finished, you can download the video in .mp4 format to re-purpose it or Download Audio in .aac format to use for your podcast. Just go to your Be.Live profile, click My Broadcasts and click Download Audio → Choose the Audio icon and click Download Audio:


💡Tip:
Regardless of whether you’re creating a long-form discussion or a short and snappy show, keep topics moving, to keep listeners engaged. To help you have all your scripts and lists of topics right in front of you, we encourage you to use our awesome Be.Live tool - Agenda! You can check the guidelines for it here.
We are happy to share more tips & tricks to make sure you can deliver the best content to your audience.