Facebook Live Streaming Requirements
To go live on Facebook, you need to meet these requirements:
- Your Facebook account and Facebook Page must be at least 60 days old.
- For creators and businesses using Pages or professional mode for profiles, you also need to have at least 100 followers.
Quick recap of the key steps:
- Open your live event on your Facebook
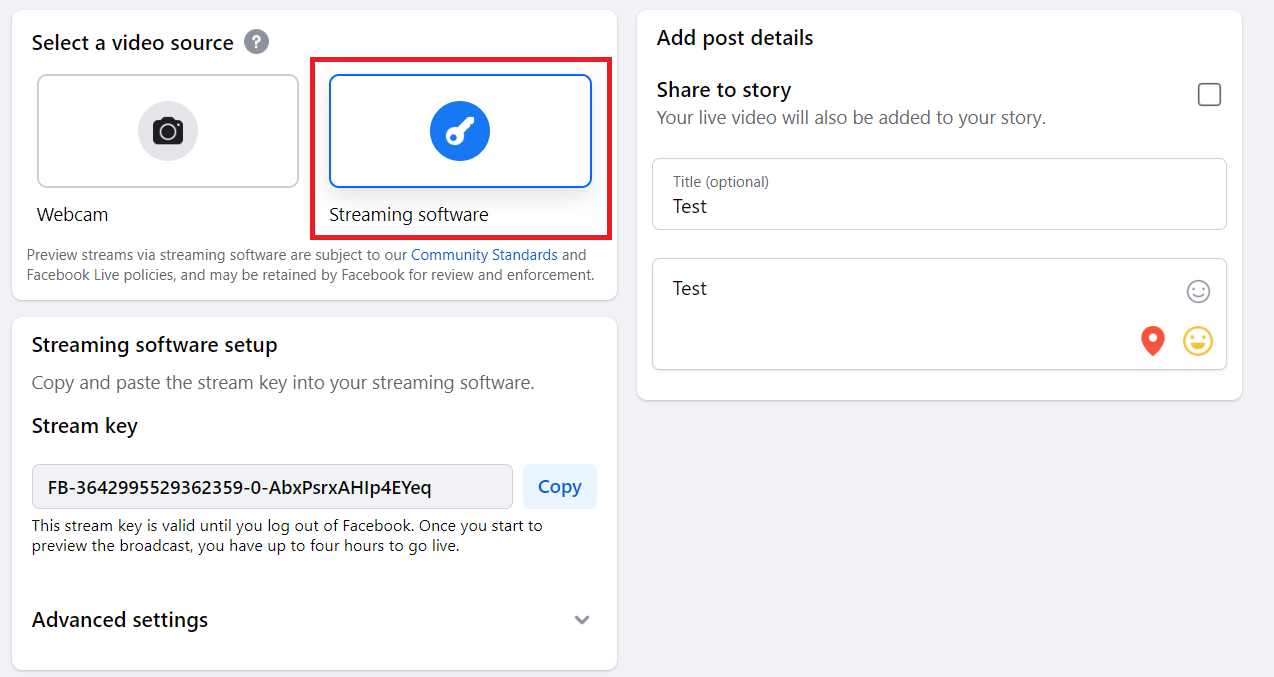
- Choose Streaming Software option in the event settings
- Copy Stream Key and Stream URL
- Go to your Be.Live Studio and enter the Key and URL for Custom RTMP destination. Save it.
- Start your broadcast on Be.Live and wait for the image to appear in your Facebook Live Producer
- Press Go Live on Live Producer as well
Set-Up
To create an event and go live, you need the following:
-
Desktop computer or laptop
-
The latest version of Chrome or Safari browser
-
Web camera
-
Stable internet connection to avoid lags and delays. We recommend using a hard-wired connection (ethernet).
-
A pair of headphones to avoid echo and feedback
-
A Facebook profile or a Business page
-
Be.Live account. Click here to create an account or log in.
Setting up your Facebook event
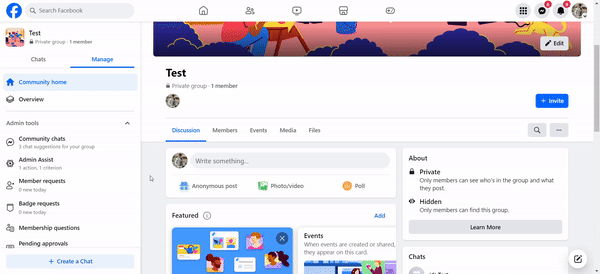
1. Go to your Personal Facebook profile (your Timeline), Group or Page.
2. Under the post creation field choose Live video.

Note: You might not see one right there. No worries, you just need to start creating your post and choose Add -> More -> Live Video
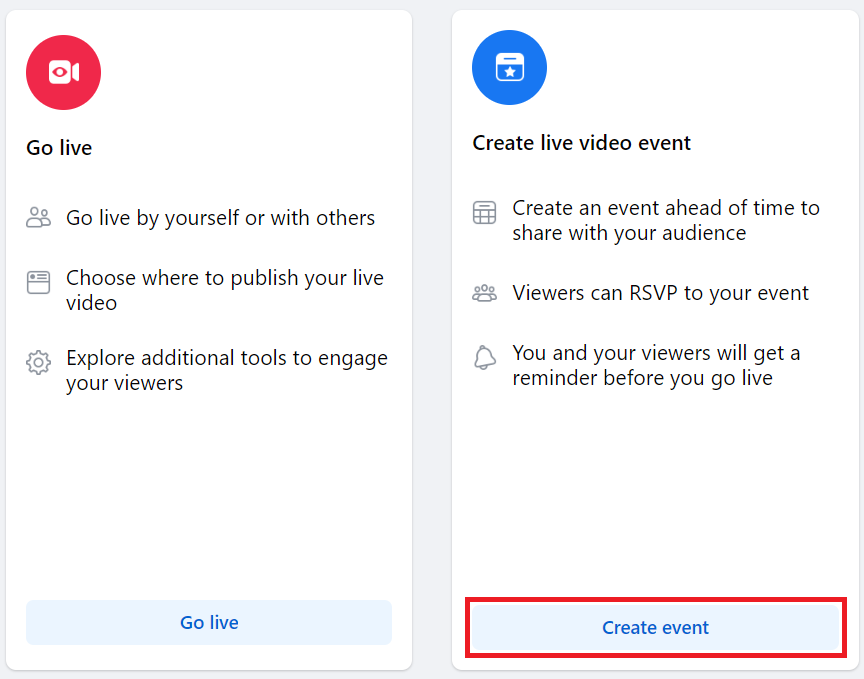
3. Once done, you should see the next window. Press Create event to proceed.
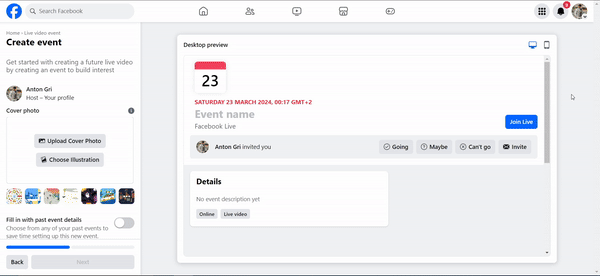
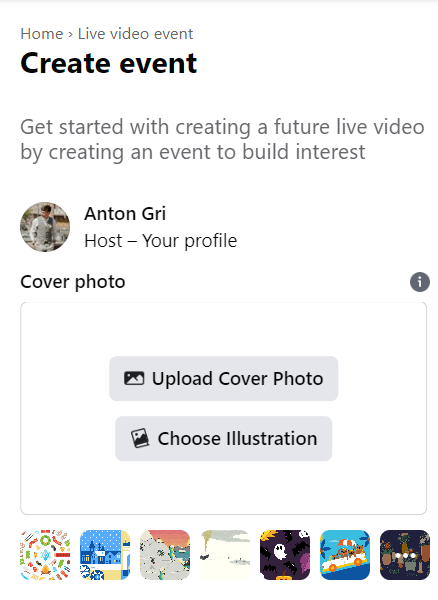
4. Now you need to add details about your event. You will find all the required fields on the left. The main screen will show you a preview of your event.
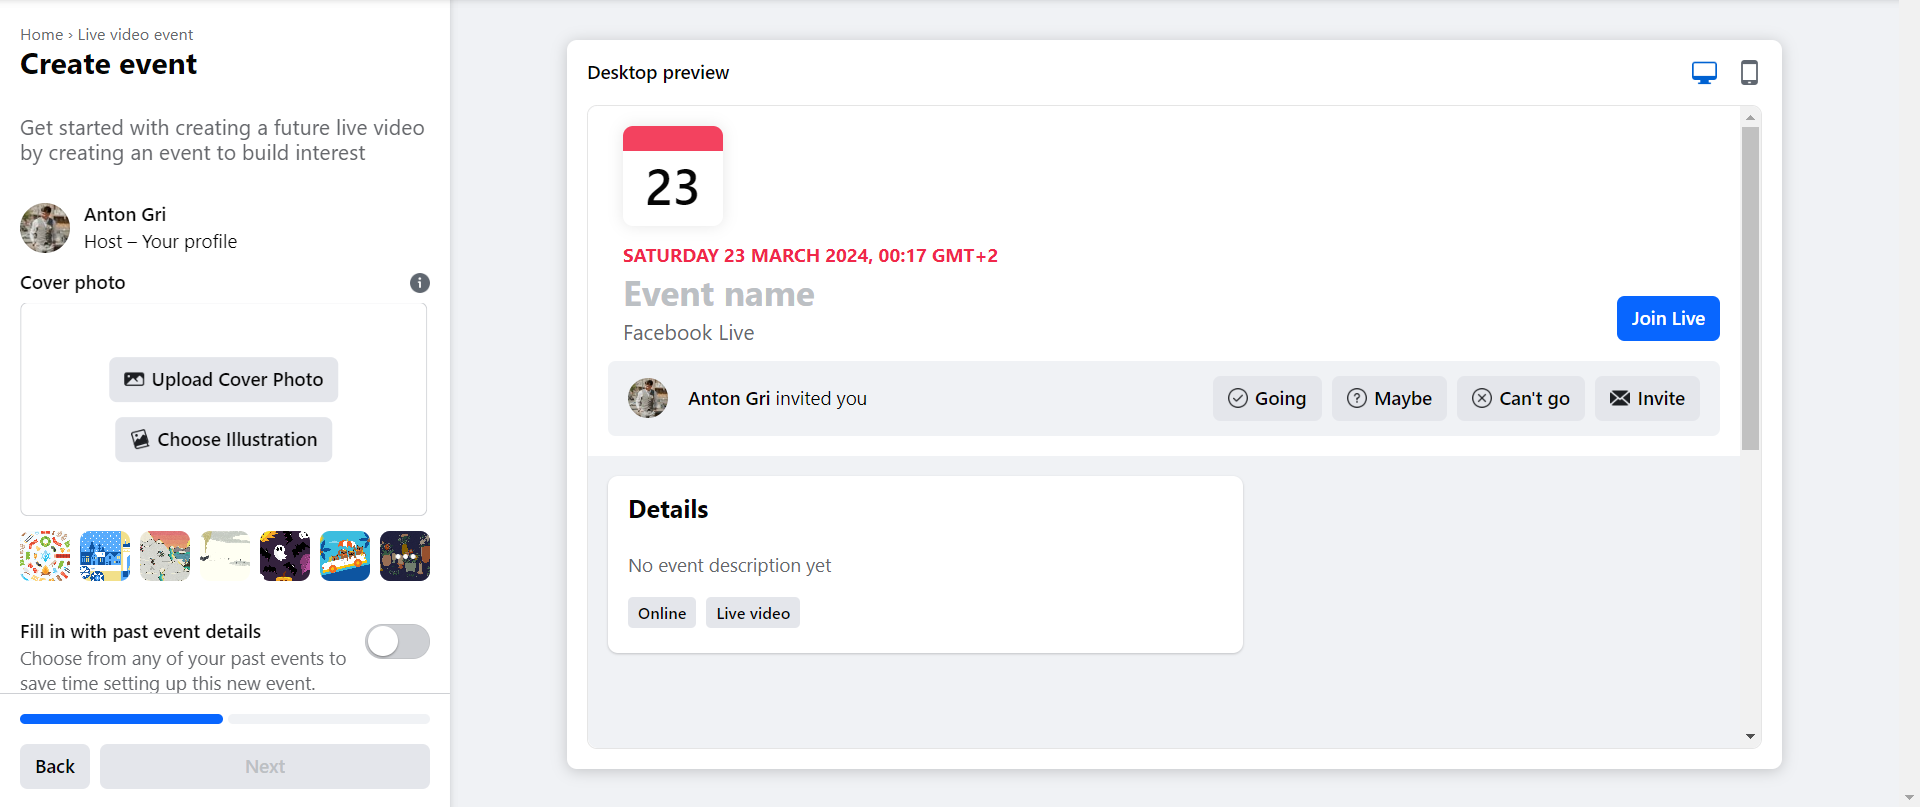
- Use the Desktop/Mobile icons to see what it looks like on different devices.
- Use the Upload Cover Photo button to add your thumbnail picture or press Choose Illustration to add a Facebook illustration picture.
- Scroll down to set up the event Name, Date and time, Privacy and Description of your broadcast. If you're creating the event in a private community, Privacy settings will be automatically set to the members and the button will not be active.
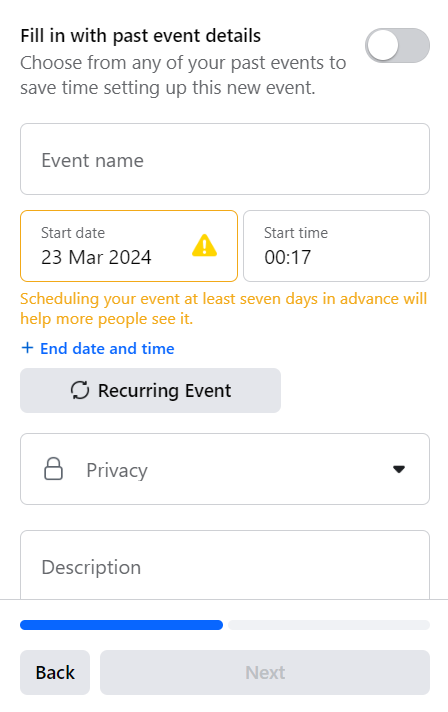
At this stage, you can also use the Fill in with past event details toggle to copy details from your past event automatically.
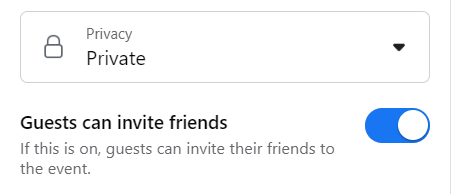
- If you're creating a private broadcast to your Timeline, you can also allow your Guests on Facebook to invite their friends to this event.
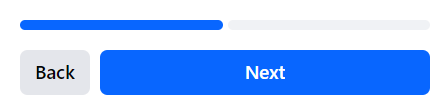
- Once all fields are filled in, the Next button becomes active and changes its colour from grey to blue.
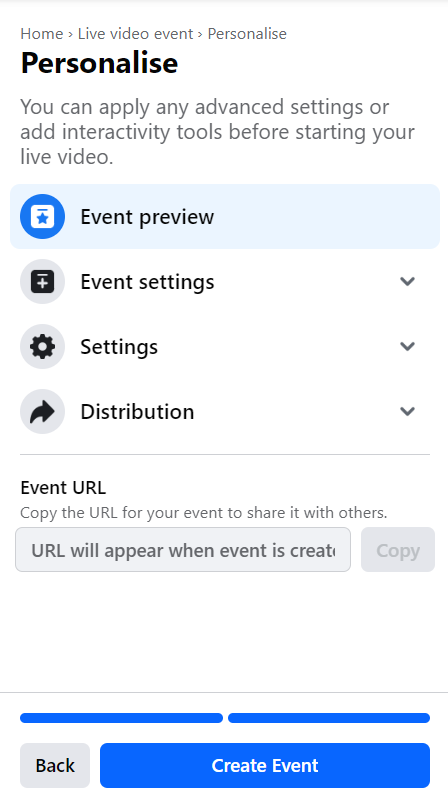
5. After you press Next you can change additional settings of your broadcast. Press Create Event to proceed.
6. Finally, the event is created and you will see the clarification pop-up.
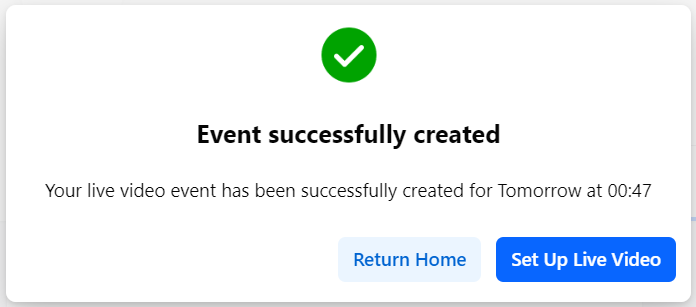
Press Set Up Live Video to set up your broadcast settings. You can also press Return Home and find this event in the Events section to finish setting it up later.
Setting up Live Video on Facebook
1. Once you press Set Up Live Video you will see the Live Producer
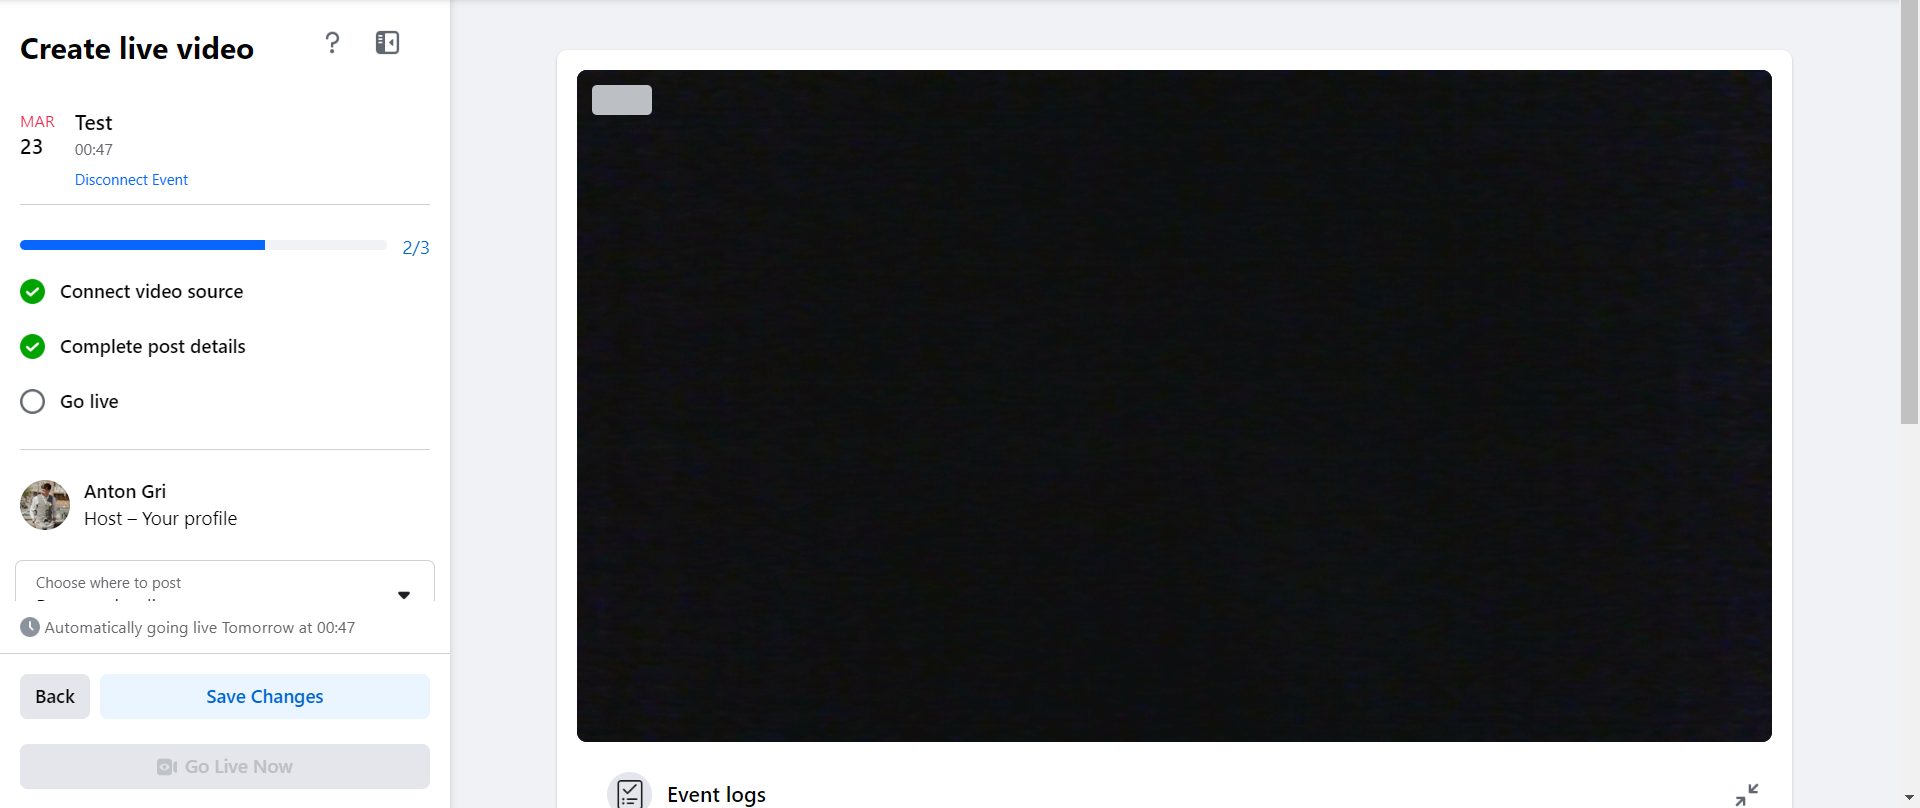
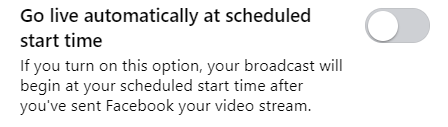
Please make sure to scroll down to Live Video settings on the left and turn off the automatic start of the broadcast.
2. Scroll down to find more options.
- You can edit the post details about your live stream here.
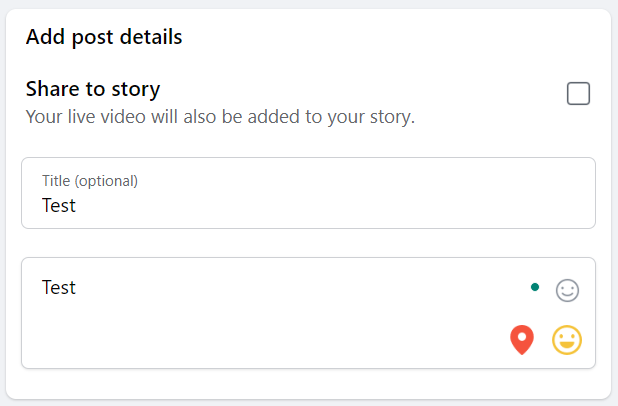
Check the Share to story checkbox to add your live video to the story.
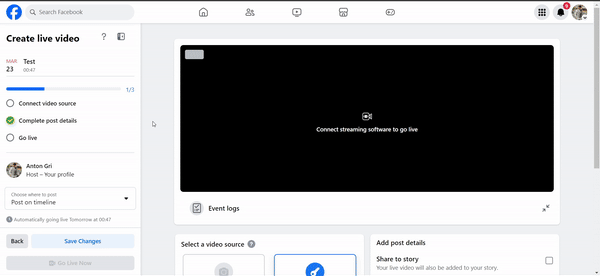
3. Here you will find the Stream Key and Stream URL. You will need them later to set up a Custom RTMP destination on Be.Live.

Note: You need to press the Advanced settings to find the Stream URL
Setting up your Be.Live broadcast
1. Go to your Be.Live studio > Set destination > Scroll down to Custom RTMP
2. Insert the Stream key and Server URL, which you can find in Live Producer. (Step 3 of the previous block)
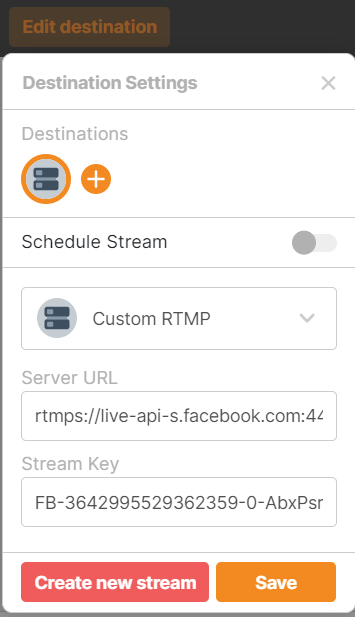
Press Save to save your destination settings.
Note: If that's the only destination you're adding, there is no need to use the Schedule Stream toggle as your event on Facebook was already scheduled.
If you're doing the multistream, feel free to use this toggle to schedule your broadcast on other destinations. You will see the error on your Custom RTMP destination if you schedule it.
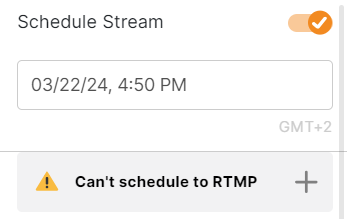
No worries, it's only a notification that Be.Live can't create an event on your RTMP destination from Studio. You can ignore it in this case as you already scheduled your event.
You can schedule several broadcasts on Be.Live. To do so, simply press Create new stream when you're checking destination settings and set it up using the instructions above.

3. To access your schedule streams, click Scheduled streams and select the broadcast from the dropdown menu:
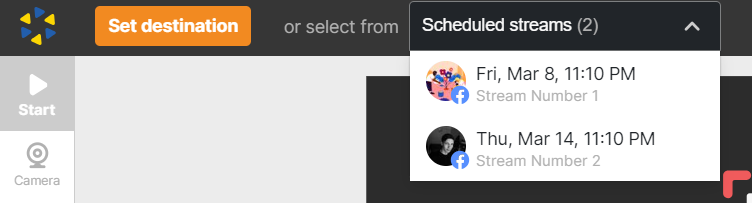
Once selected, stream settings will appear on the left side of the studio.
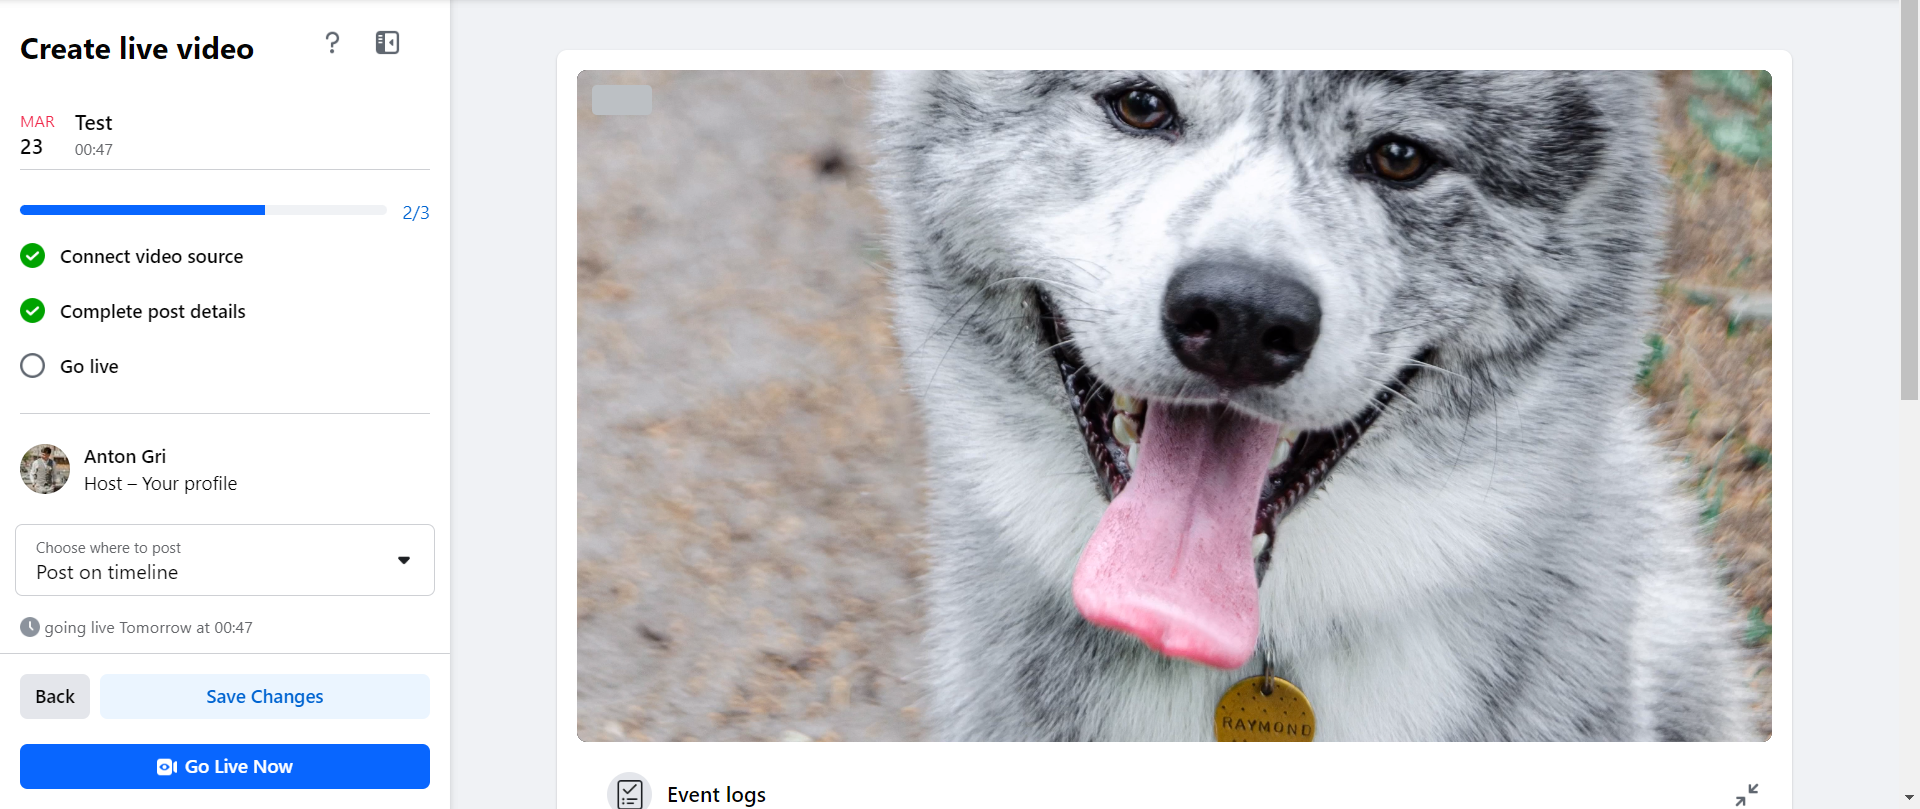
When you're ready to start your broadcast, press Start to connect to Facebook Live Producer first.
4. Go back to the Facebook Live Producer page and check if you can see your image from Be.Live Studio here.
Be.Live Studio view

Facebook Live Producer view
Note: If you see the preview of your broadcast, but the Go Live Now button is still grey, make sure you turned off the automatic start on Facebook.
5. Press Go Live Now to actually start your broadcast.
That's it! Happy broadcasting! 🧡
Q&A
_______________________
Can I edit the time and date of my event?
Yes, you can edit the time and date in the settings of your event. You can also edit the title, description, cover photo, event format type, guest list visibility, and co-hosts. Please note that you cannot edit the event privacy, the “guests can invite friends” setting and the ticket cost after creating an event.
Will I see comments from the event in my Be.Live studio?
No, comments don't appear in the studio when streaming with custom RTMP.
How can my guests join the event?
Invite your guests directly to your Be.Live broadcast by sharing a guest link with them. The guests added to your Be.Live studio will appear on your event once you add them to the stream. Learn more about adding guests here.
Related article:
How to Set Up an Account with Be.Live