By including a presentation, you can make your broadcasts more interesting and informative for your viewers. This article will cover 3 different ways to share a presentation.
First, create a broadcast. Check out our articles on how to go live on Amazon, Facebook, YouTube and LinkedIn or with Custom RTMP.
Option 1: Upload presentation directly to the Studio
You can easily upload slides in formats .pdf, .pptx, .ppt directly to the Studio!
Here is how you can upload the presentation:
-
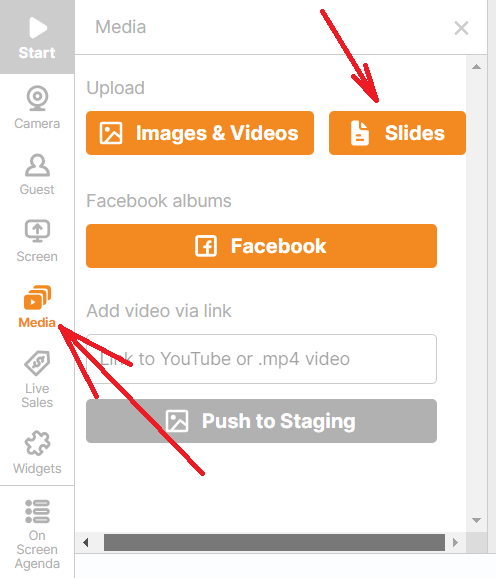
Click on Media, then Slides and select your presentation.
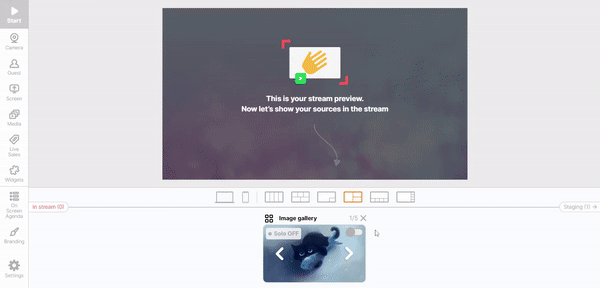
2. After that, you will see the presentation in the studio. You can easily switch between slides by using the white arrow buttons:
Option 2: Create a Live Sales list
You can easily share your slides using our Live Sales feature. Live Sales allows you to display images and scroll through them from a customized list you created. Here's how:
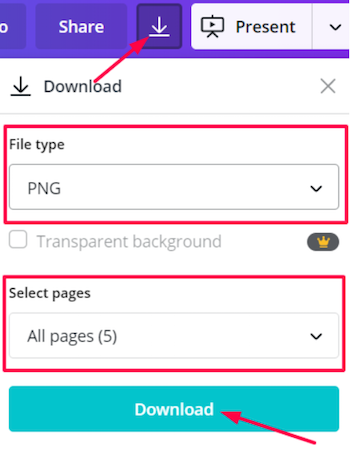
1. Save your PowerPoint Presentation as images, click File > Save as... > .jpg or .png > All slides
We also advise making your slide show using Canva, a free online platform that helps you create beautiful designs with no effort. There are different templates to choose from and you can download the presentation as PNG images in just one click.
2. Once the images are ready, upload them to the list.
From the toolbar, click Live Sales > Add New List > Upload the first image > click Add Item to add another image and repeat the same steps:

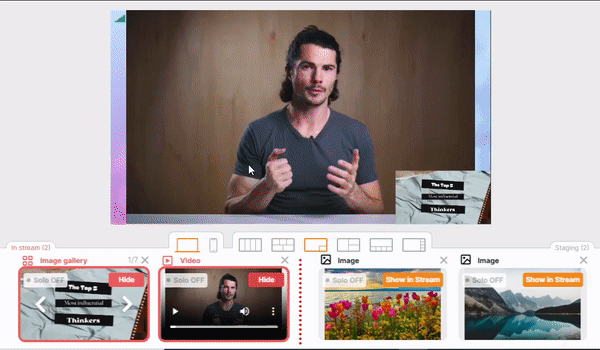
Push the presentation to the staging area by clicking the orange arrow button. To display the presentation, click Show In Stream. Select your preferred layout under the big screen. You may also easily switch to the next or previous slide using the white arrow buttons:
3. Once the list is ready, click Start to begin your broadcast.
Option 3: Upload multiple images using Add Media
As an alternative, you may also upload images of your presentation (up to 10 at the same time) and store them in a single section.
From the toolbar, click Media > Images & Videos

And select your images: 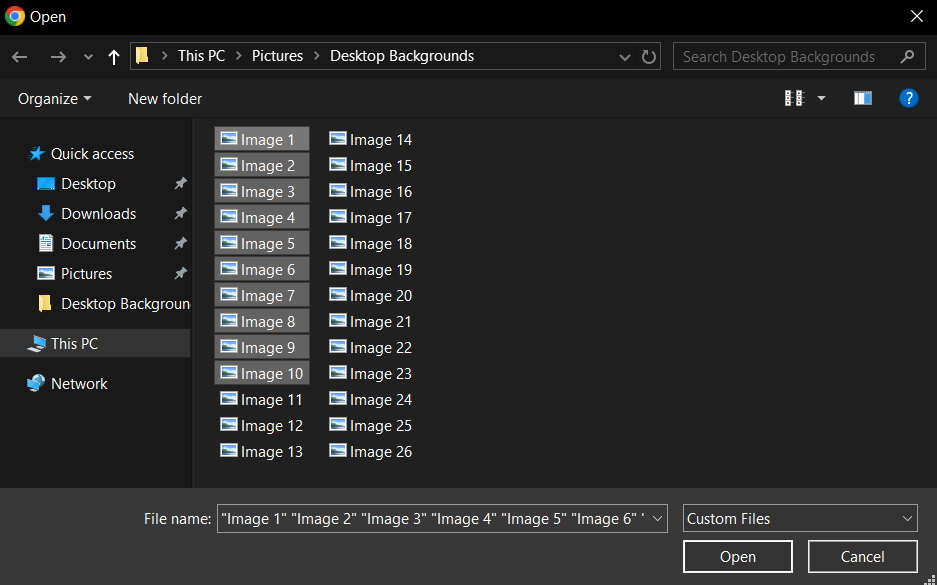
Use the white arrow buttons on the list to go through the images easily.
Option 4: Screen Sharing
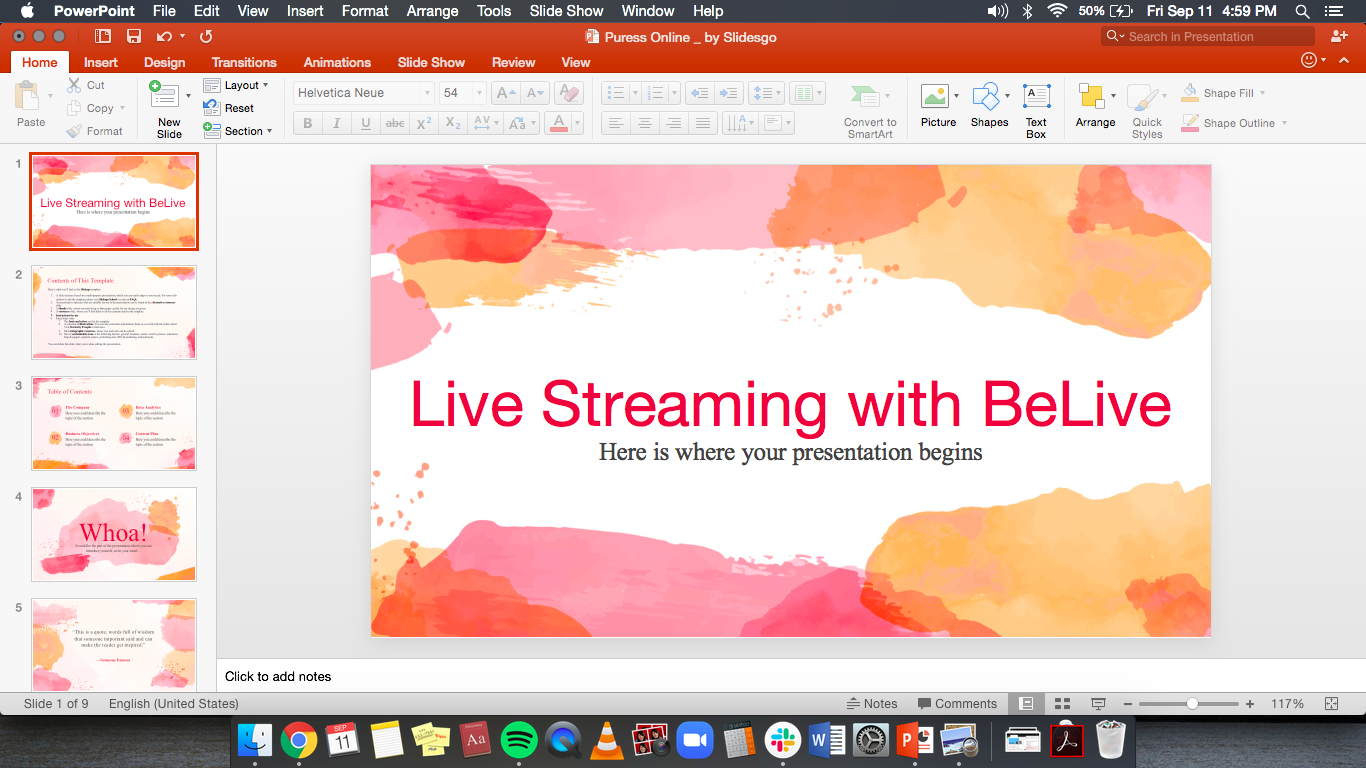
1. Open your PowerPoint presentation.
-
On Mac, you have to have the application open, but not full-screen. You will see all the available for sharing windows in the pop-up window (check the screenshot below). That can be your browser, keynotes presentation, or any other app.
-
On Windows, the application window has to be open (and not minimized to the Dock panel), otherwise it won’t be available for sharing.
2. Go to the Studio, click the Share Screen button.
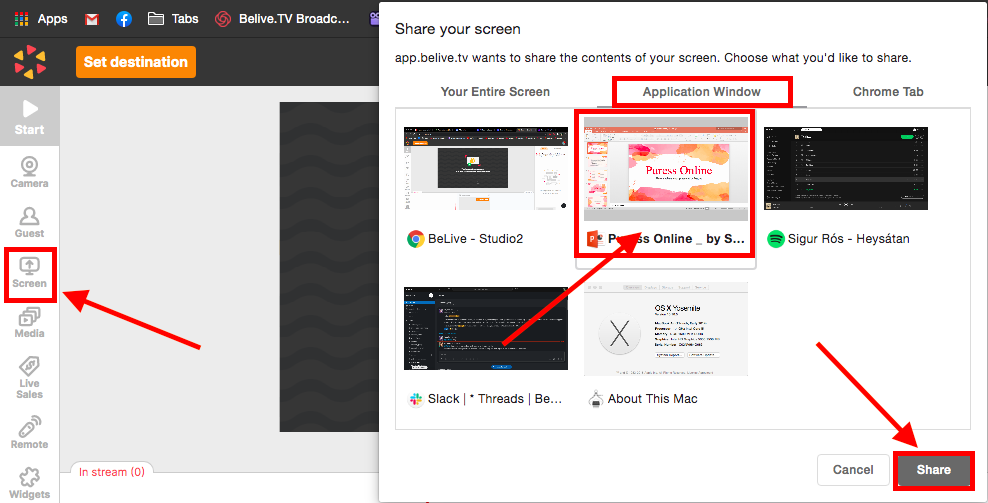
3. A pop-up box would appear where you can select to share an Application Window, your Entire Screen or a Chrome tab. Choose Application Window sharing, select your PowerPoint Slideshow presentation and click on Share.
4. Go back to the presentation and press F5 (for Windows) or Shift+Command+Enter (for Mac) to view the slideshow in Presentation mode.

5. Switch back to Chrome using keyboard shortcuts Alt+Tab (for Windows) or Command+Tab (for Mac) and enter the Be.Live studio.

6. Once you are ready to start presenting it to your viewers, add it to the stream by clicking Show in Stream. You can also change the layouts any time before or during the broadcast.

Other things to know
-
You would need to switch slides manually using arrow keys. You can go back and forth between slides and studio to run the broadcast. Don't worry - viewers will only see the slides.
-
If you prefer to speak over the slides and don't want to be seen, add your camera to the broadcasting section along with the shared screen and click Stop Video on your camera source.
-
You can simply Drag and Drop your sources for smoother transitions when changing the order or adding new sources to the stream.