Set-up
To go live, you need the following:
-
Computer/laptop
-
The latest version of Safari browser
-
Web camera
-
Stable internet connection to avoid lags and delays. We recommend using a hard-wired connection (ethernet).
-
A pair of headphones to avoid echo and feedback
NOTE: You will not be able to use the screen share feature with Safari. Please switch to Chrome if this feature is essential for you.
Setting your broadcast destination
1. Log in to your Be.Live account using the latest version of Safari.
2. Click Set Destination on the upper left section of the studio.
3. If you want to schedule a Facebook broadcast, click here. If you want to go live now, do not enable the Schedule Stream toggle.
4. Select Facebook as your destination. You will notice a spinning wheel appear below Facebook. Click the pop-up blocker icon shown below to grant permissions for Facebook. If it's not there, refresh the page.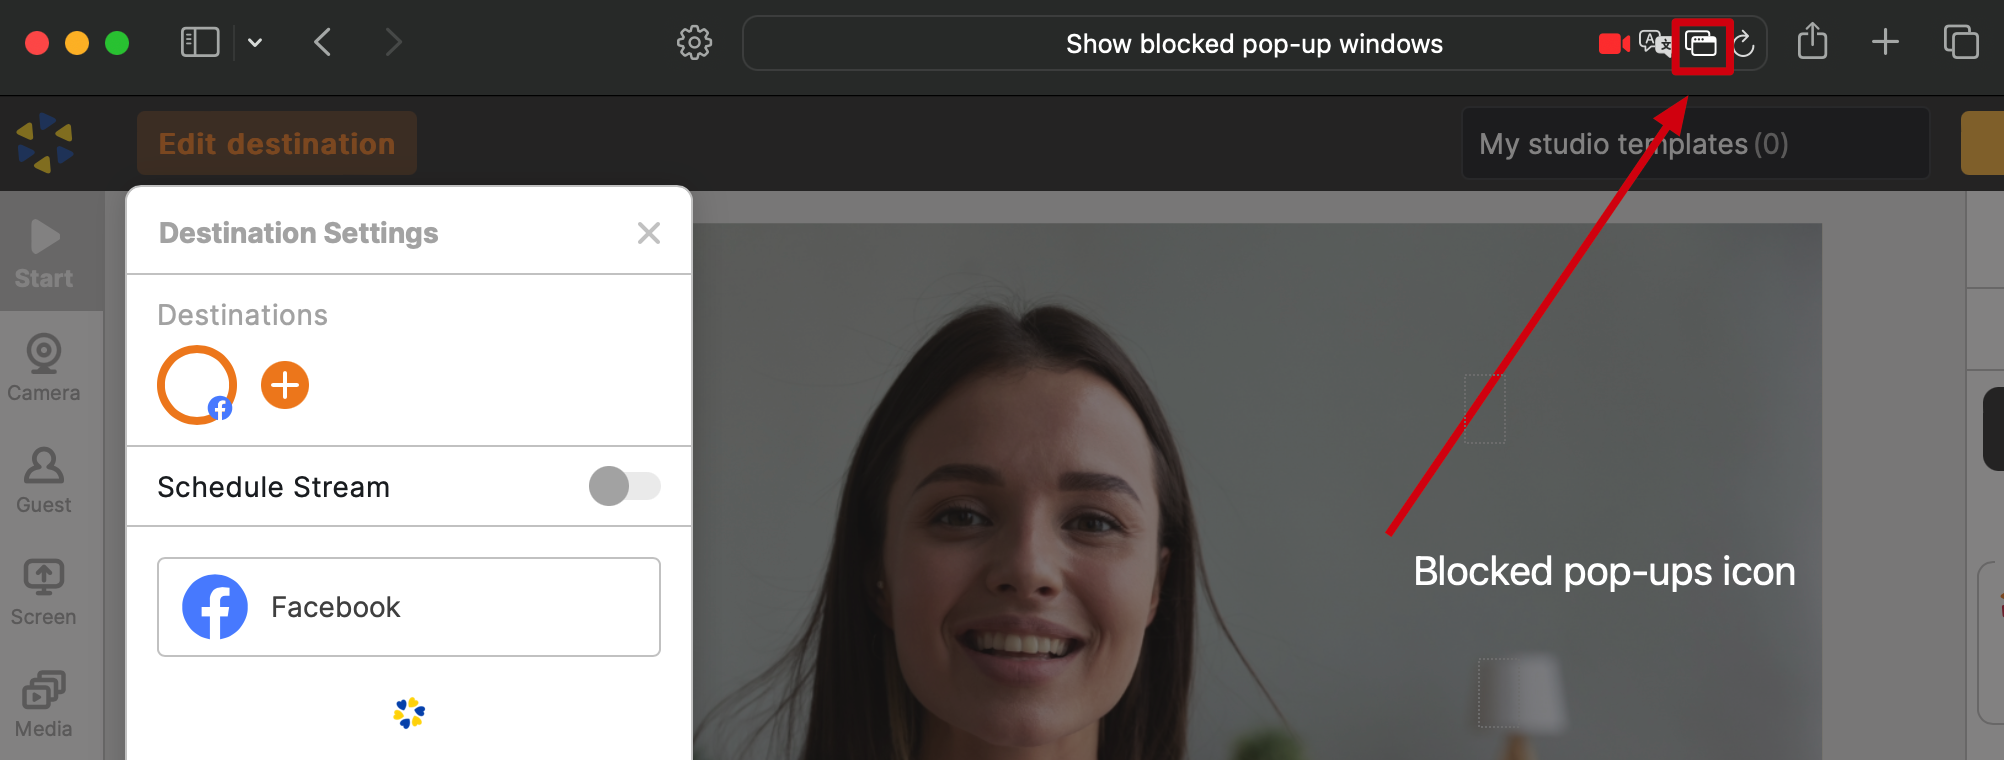
5. Select a specific destination (timeline or any page/group that you manage). If you cannot see your page or group in the list, click here.
6. Add a broadcast title and description.
7. Hit Save.
Here are some guides if you need to broadcast to Amazon, Youtube or LinkedIn:
Do you need to broadcast to other destinations than Amazon, Facebook, Youtube, or LinkedIn? Check out how to use custom RTMP here.
Connecting your camera
Now that your destination is set, click Camera from the toolbar to push your webcam to the staging section:
Related article: How to Check Camera and Microphone Settings Inside the Production Studio
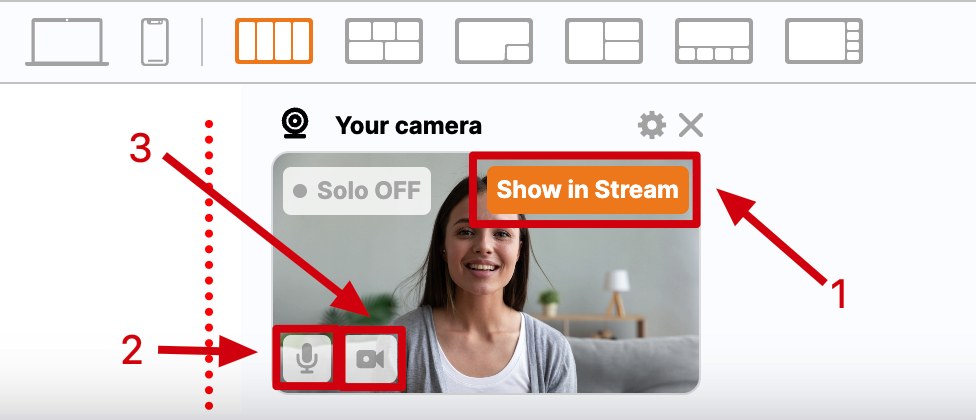
You will notice 3 buttons on the camera source:
-
Show in Stream - pushes your camera source to the broadcasting section
-
Mute - disables your microphone (viewers stop hearing you)
-
Stop video - disables your camera (viewers stop seeing you)
Move yourself to the broadcast by clicking Show in Stream.
Starting and ending your broadcast
After pushing your camera to the broadcasting section, click Start to begin your broadcast. A 3-second countdown will appear to signal the start of the stream. To end your broadcast, click the stop button.
Related article:
How to Download Broadcasts from Be.Live