Quick recap of the key steps:
- Open Instagram.com on your PC/Laptop
- Set up your live broadcast on Instagram, then copy Stream URL and Stream Key
- Without closing the Instagram pop-up, go to Be.Live Studio and insert the URL and Key for your Instagram destination. Save it.
- Start your broadcast on Be.Live
- Press Go Live on Instagram.com as well
Setting up the Instagram destination
Step 1
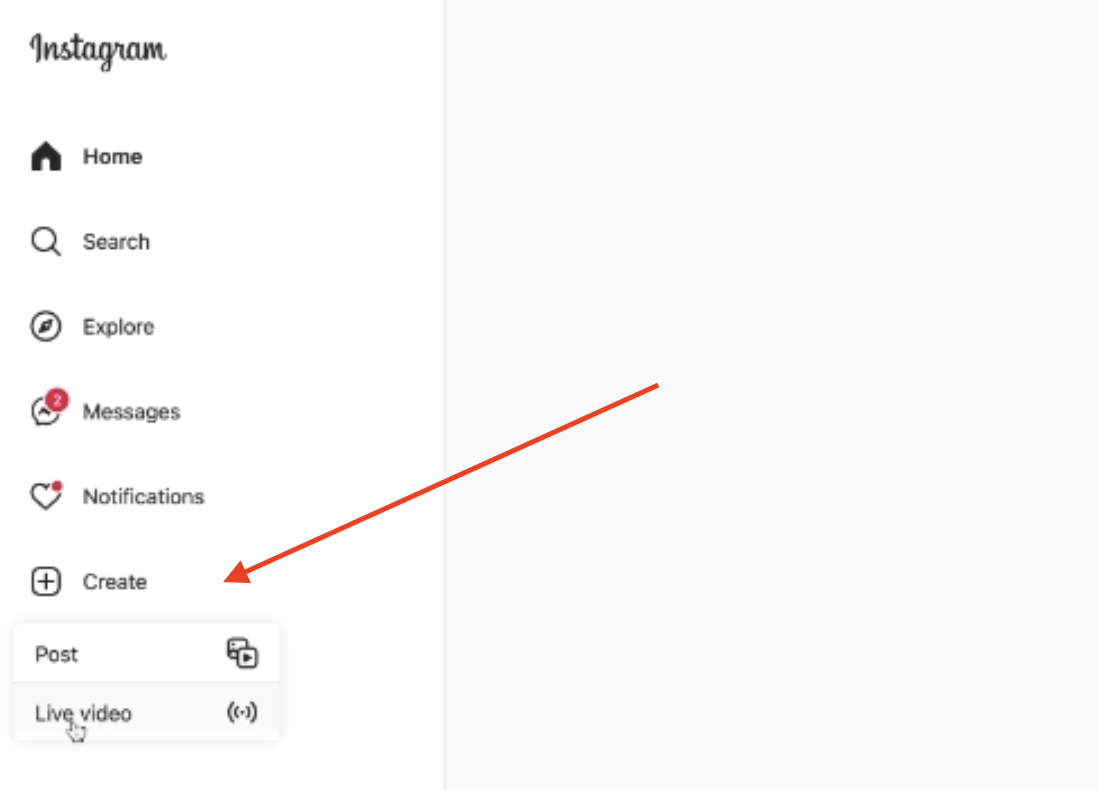
Open instagram.com on your desktop, click the Create button, and select the Live video option from the dropdown menu:
Step 2
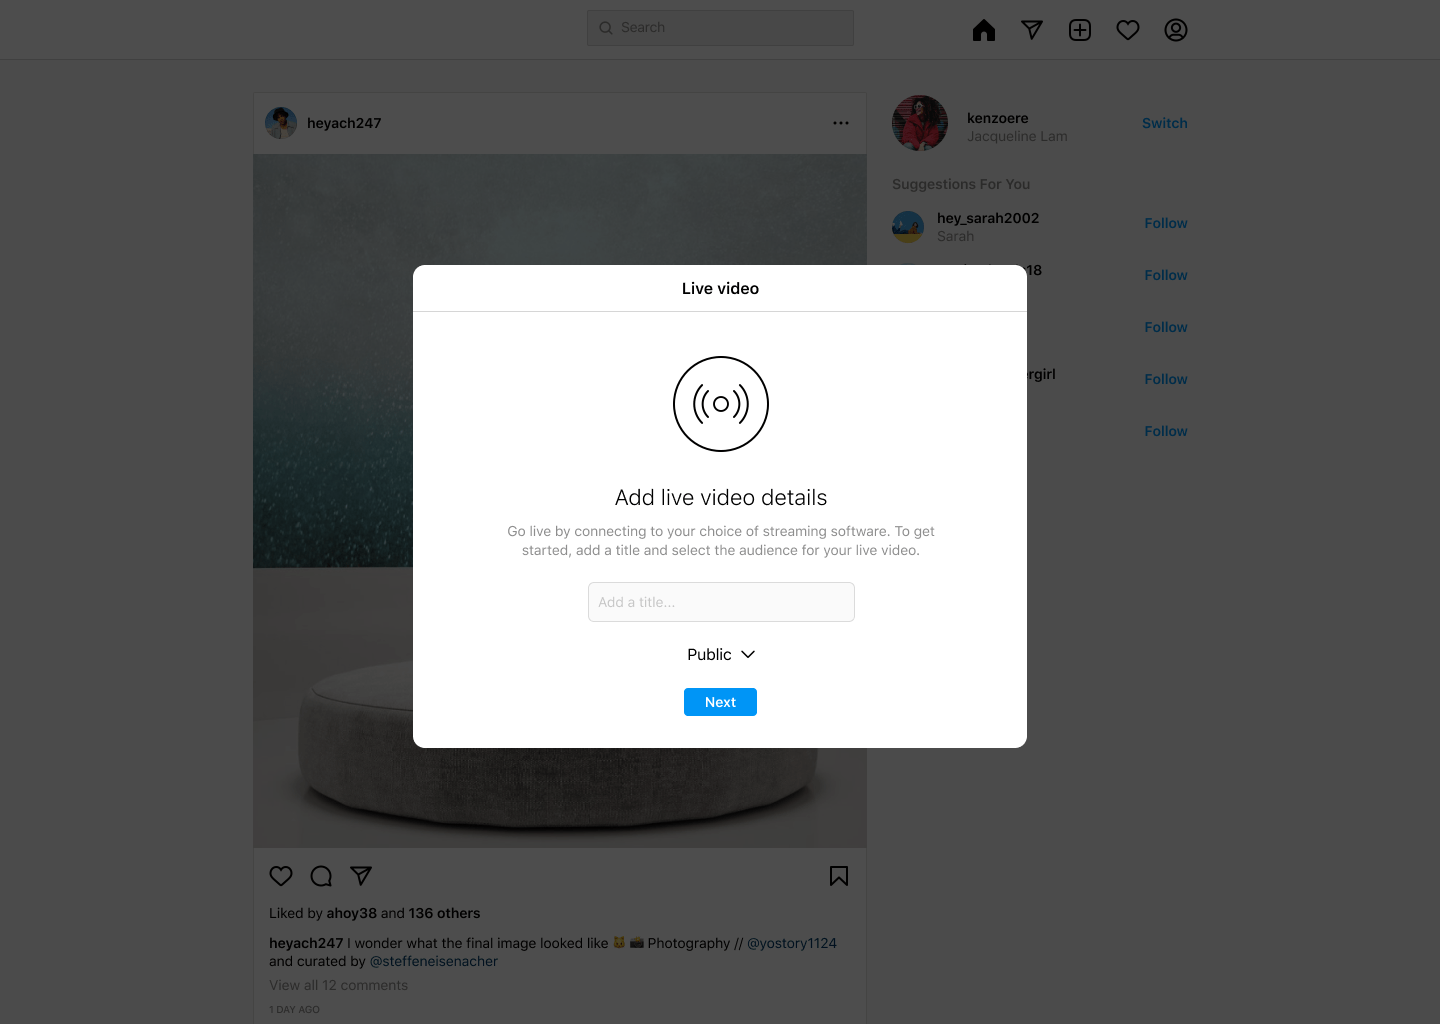
When the Go Live screen opens, enter the title of the broadcast. After that select your audience: choose Practice if you don't want your stream to be broadcasted to anyone and Public for your show to be streamed to your Instagram followers:
Step 3
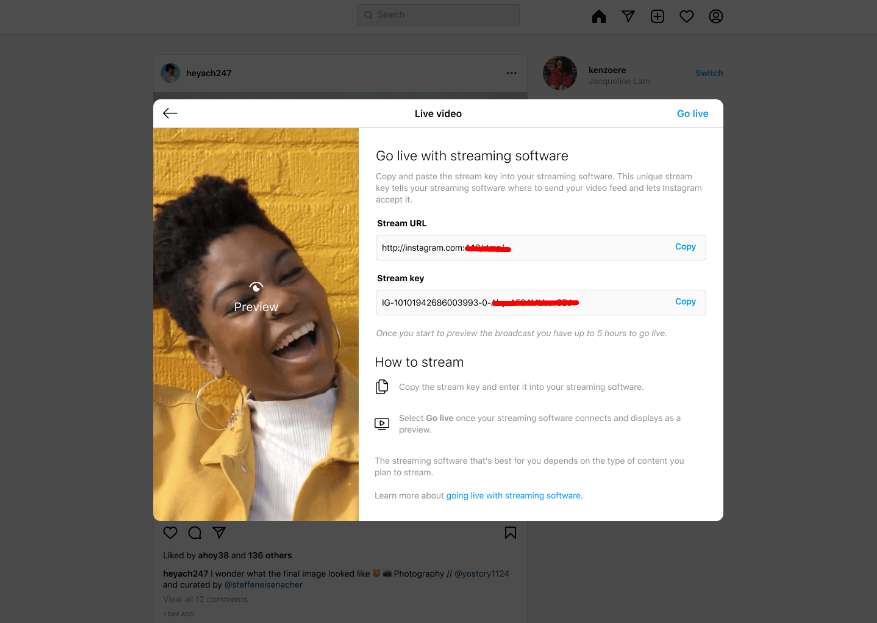
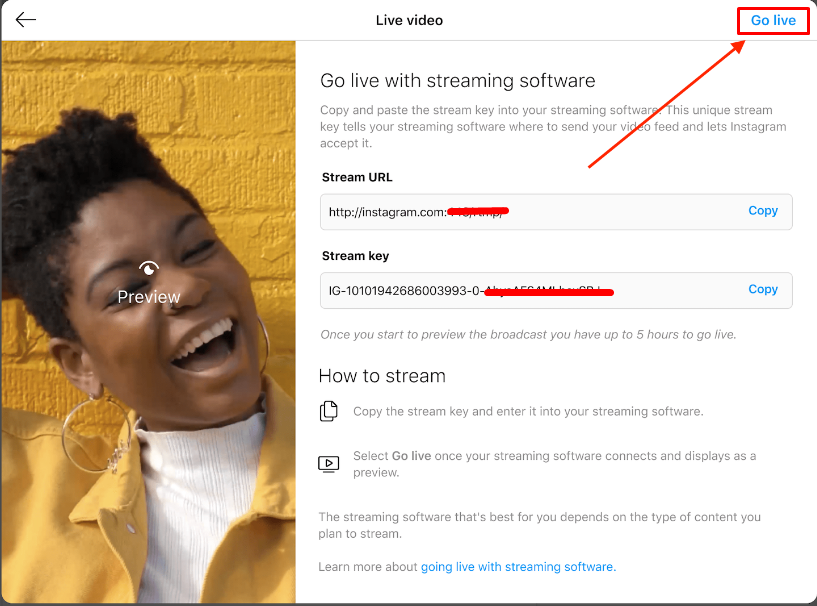
After clicking on the Next button, the screen with your unique Source URL and Stream key should be open. You will need to copy those broadcast credentials to insert them later in your Be.Live studio:
Setting up the Be.Live Studio
Step 4
Now let's head over to your Be.Live studio and set up a broadcast there.
Select the Instagram destination and insert the Server URL and Stream key from the previous step and click on Save:

At this point, you can also create a simulcast broadcast and stream to different destinations along with your Instagram one.
Step 5
Now that your destination is set, click Camera from the toolbar to push your webcam to the staging section:
You will notice 3 buttons on the camera source:

-
Show in Stream toggle - pushes your camera source to the broadcasting section
-
Mute - disables your microphone (viewers stop hearing you)
-
Stop video - disables your camera (viewers stop seeing you)
Move yourself to the broadcast by clicking the Show in Stream toggle.
Step 6
After pushing your camera to the broadcasting section, click Start to begin your broadcast. A 3-second countdown will appear to signal the start of the stream. To end your broadcast, click the Stop button:
Step 7
After starting the stream on Be.Live, it should appear in the Preview section on Instagram. Click Go Live on Instagram, to begin broadcasting!
Step 8
❗ Once your broadcast is finished, make sure to end the video on both platforms. Click End Live Video on Instagram, and the Stop button in the Be.Live Studio.
Related articles:
How to Check Camera and Microphone Settings Inside the Production Studio
How to Stream to Multiple Platforms (Multistreaming)