Starting something new can feel a bit overwhelming — there’s so much to explore, and it’s not always clear where to begin. But don’t worry! This quick guide is here to make your first steps smooth and easy. We’ll walk you through the basics, show you how to find your way around, and help you create content your viewers love.
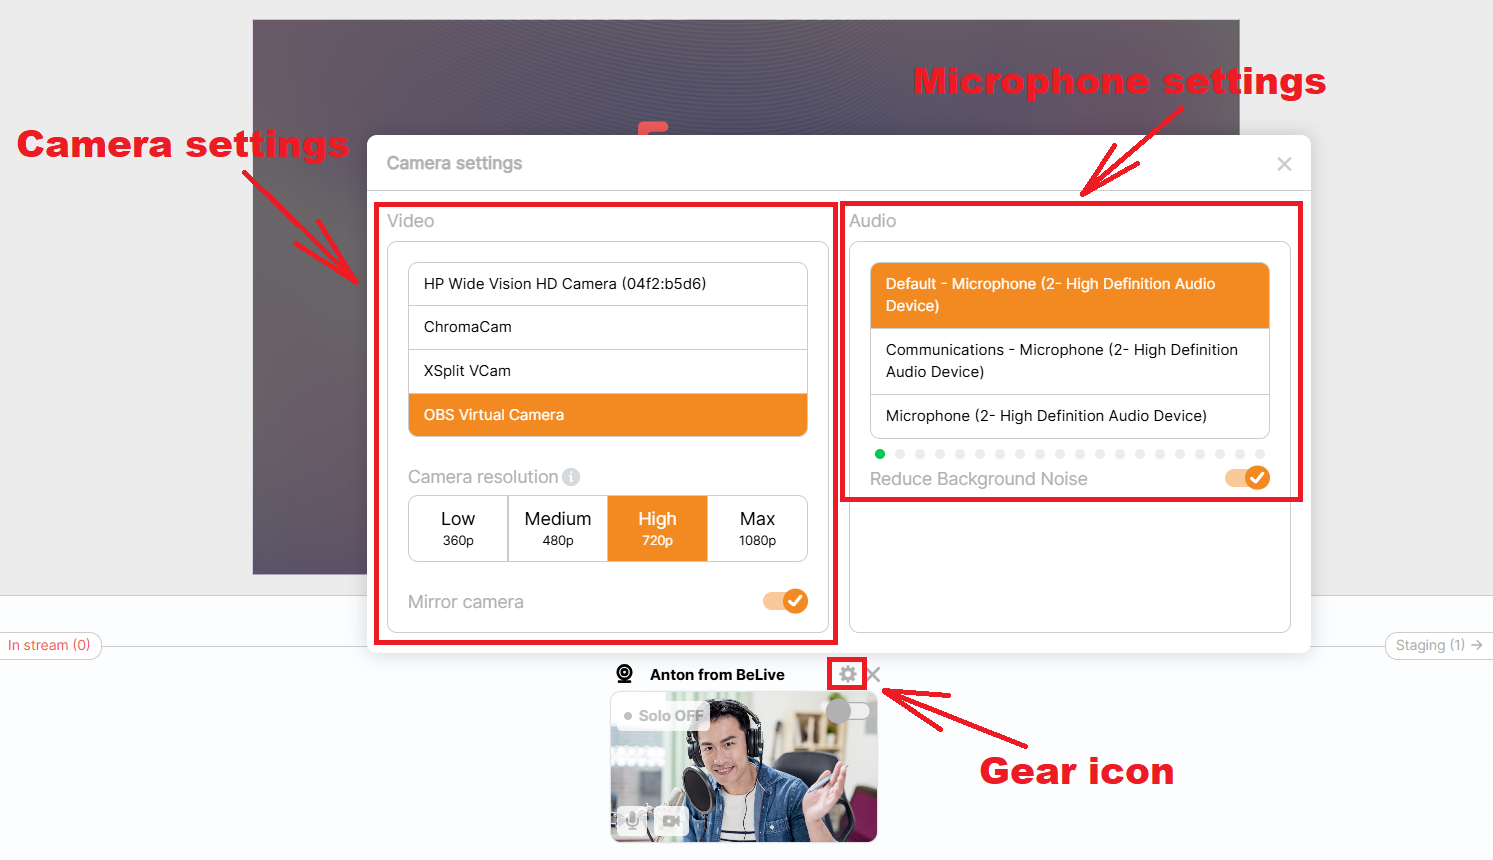
Step 1: Check Your Camera and Microphone
- Connect your camera and allow browser permissions
- Check your Camera & Mic Settings by clicking the gear icon above your camera source.
💡 Tip: Want to make your stream feel more professional instantly?
Try a clean, non-distracting background (solid color wall or curtain works great), and make sure you’re well-lit from the front — even natural daylight helps.
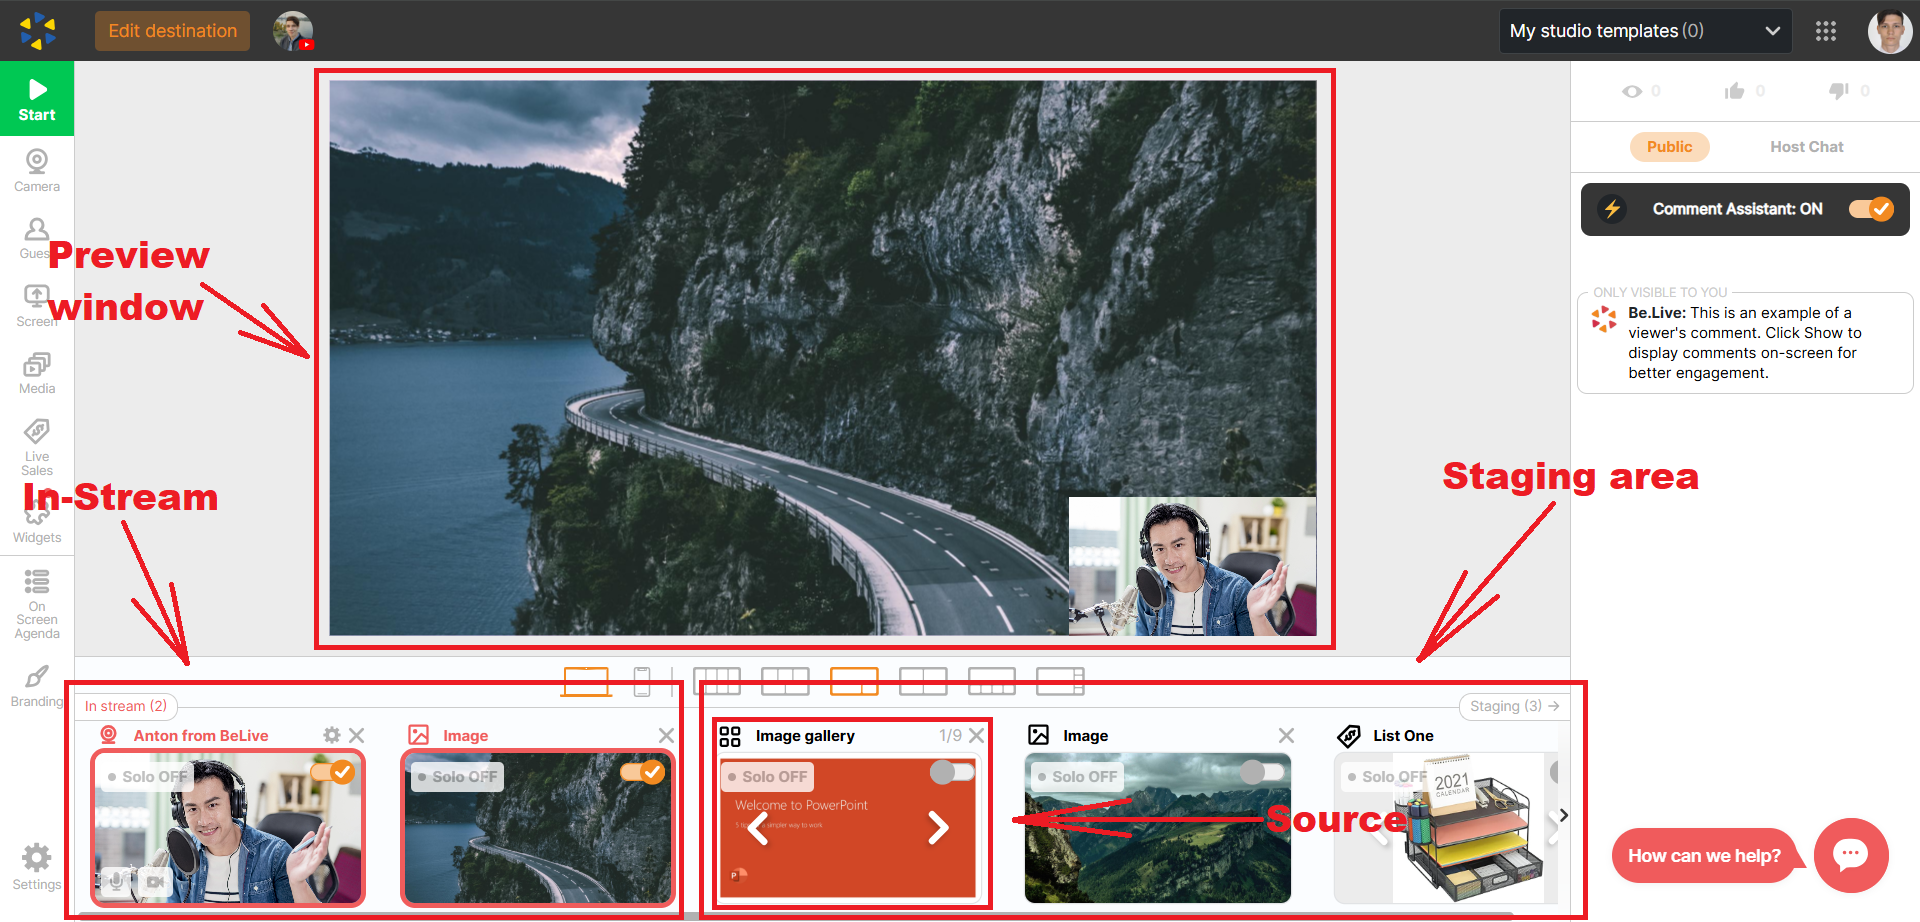
Step 2: Understand the Studio Layout
- Your camera starts in the Staging Area (off-screen). Just switch the toggle to move it In-Stream and show in Preview.
- Use the Preview Window to see exactly how your stream will look.
💡 Tip: You can test everything without going live.
Step 3: Edit and Display Your Name
- Click above your camera source to edit the name that will appear on screen and use the eye icon to display it.
- This helps your viewers know who you are at a glance.
NOTE: The source should be moved to the In-Stream area before you can show the name tag. But you can edit it in Staging Area.
Step 4: Personalize Your Branding
- Locate Branding in the toolbar on the left side: Pick an overlay, apply your theme colors, and select a background.
- These settings apply to all your future streams (but you can change them anytime).
- Check our full branding article
💡 Tip: Keep it simple — one overlay + a color that matches your brand or personality is often enough to stand out.
.gif)
Step 5: Use the Agenda to Guide Your Stream
- Add lower thirds in the Agenda panel to keep your viewers engaged.
- Use Private notes as a built-in teleprompter
- Discover how to use the Agenda feature
💡 Tip: Display one main message as a crawler — perfect for giveaways, reminders, or anything that deserves attention. Adding just 3–4 titles to your Agenda can help you stay on track and keep things structured — especially useful if you’re nervous!
Step 6: Go Live, Multistream, Record, or Just Preview
- Click the Set Destination button to choose where you want to go live. You can stream to multiple platforms at once, including:
→ Facebook (timeline, Pages, or Groups)
→ YouTube
→ Amazon Live
→ LinkedIn
→ Instagram, TikTok, or other custom destinations via RTMP - See All Streaming & Destination Setup Guides
- You can also schedule a stream for later, or choose Record Offline to test things out privately.
💡 Tip: Scheduling is great if you want to build anticipation and give your audience a heads-up — but it’s just as powerful to go live when you’re in the moment and inspired.
✅ You’re Ready!
Explore, test, and make it yours — streaming is more fun (and easier) than you think.