Facebook Live Streaming Requirements
To go live on Facebook, you need to meet these requirements:
- Your Facebook account and Facebook Page must be at least 60 days old.
- For creators and businesses using Pages or professional mode for profiles, you also need to have at least 100 followers.
Video Tutorial
Related video tutorial: How to Stream with Be.Live - A Complete Tutorial [YouTube]
Set-up
To go live, you need the following:
-
Desktop computer or laptop
-
The latest version of Chrome or Safari browser
-
Web camera
-
Stable internet connection to avoid lags and delays. We recommend using a hard-wired connection (ethernet).
-
A pair of headphones to avoid echo and feedback
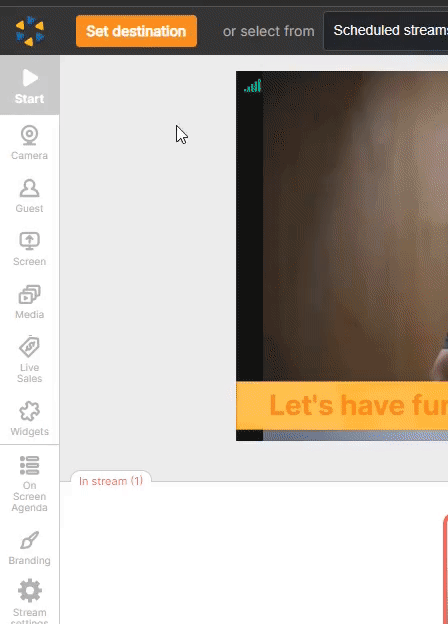
Setting your broadcast destination
.gif)
-
Log in to your Be.Live account using the latest version of Google Chrome or Safari.
-
Click Set Destination on the top left section of the studio.
-
If you want to schedule a Facebook broadcast, click here. If you want to go live now, do not enable the Schedule Stream toggle.
-
Select Facebook as your broadcast platform then select a specific destination (timeline or any page that you manage). If you cannot see your page in the list, click here.
❗ If you wish to go live on Facebook Group please use a specific destination called FB Group. You can learn more about it here.
-
Add a broadcast title and description.
-
Hit Save.
⚠️ Note: We do not require a stream key when broadcasting to Facebook Timeline or Page.
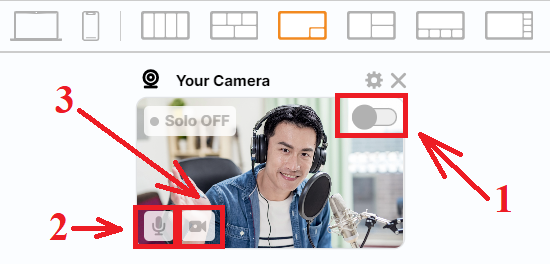
Connecting your camera
Now that your destination is set, click Camera from the toolbar to push your webcam to the staging section:

You will notice 3 buttons on the camera source:
-
Show in Stream toggle - pushes your camera source to the broadcasting section
-
Mute - disables your microphone (viewers stop hearing you)
-
Stop video - disables your camera (viewers stop seeing you)
Move yourself to the broadcast by clicking the Show in Stream toggle
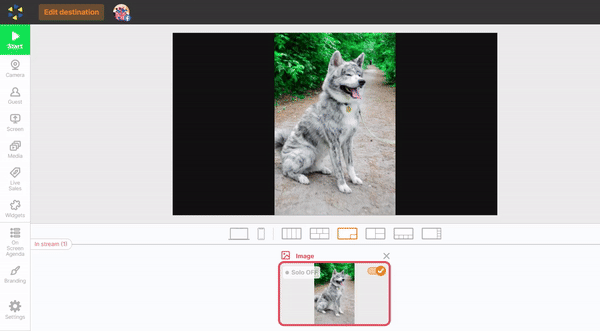
Starting and ending your broadcast
After pushing your camera to the broadcasting section, click Start to begin your broadcast. A 3-second countdown will appear to signal the start of the stream. To end your broadcast, click the stop button:
Related articles:
How to Go Live to your Facebook Group using RTMP
How to Set Up an Account with Be.Live
How to Check Camera and Microphone Settings Inside the Production Studio
How to Download Broadcasts from Be.Live